Home

Byakeem

holland fifth wheel parts catalog pdf

Discover the essential guide to Holland Fifth Wheel parts with our comprehensive PDF catalog. This resource provides detailed information for maintaining and upgrading your trailer, ensuring optimal performance. Explore the user manual and other key resources for smooth operations.

Importance of Fifth Wheel Parts in Trailers

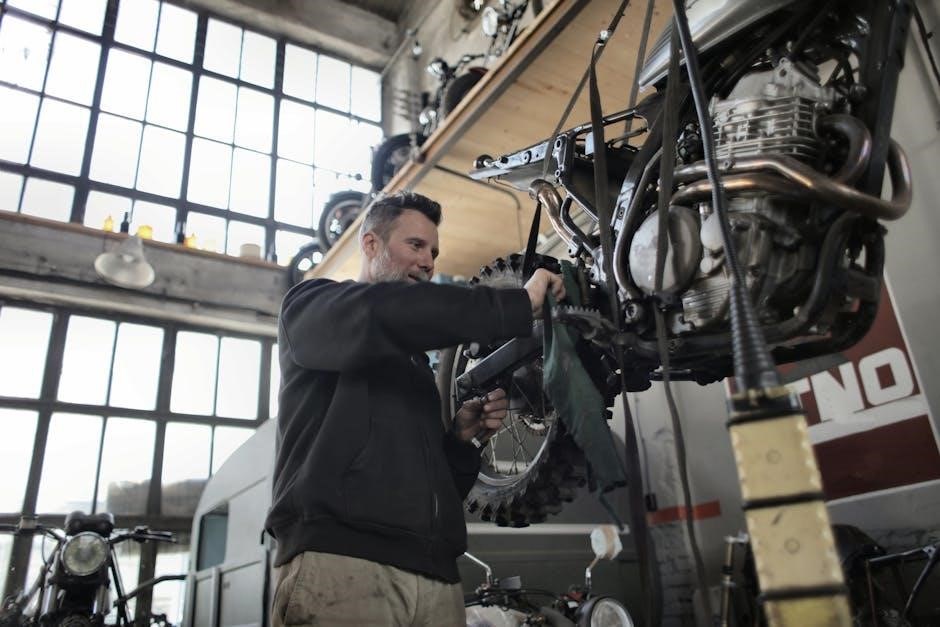
Fifth wheel parts are crucial for trailer safety and functionality. They ensure secure coupling, stability during towing, and even load distribution. Key components like the kingpin, coupling, and suspension contribute to smooth performances. Regular inspection and maintenance prevent wear and tear, avoiding costly repairs. Properly functioning fifth wheels enhance towing efficiency and reduce accident risks. Without these parts, trailer operations become unsafe and inefficient, potentially leading to accidents and frequent breakdowns.

Overview of the Holland Fifth Wheel Parts Catalog

The Holland Fifth Wheel Parts Catalog provides an exhaustive guide to understanding and maintaining your trailer’s fifth wheel system. It details axle assemblies, suspension systems, and coupling components, ensuring comprehensive coverage for each part. The PDF format offers clear diagrams and descriptions, making it easy to identify and locate components. This resource is vital for ensuring efficient trailer maintenance, repairs, and upgrades.

Understanding the Holland Fifth Wheel Parts

Discover the key components of a Holland fifth wheel, including axle, suspension, and kingpin systems. Learn about coupling mechanisms, ladder frames, brake systems, and lubrication points. Proper understanding ensures safe and efficient trailer operation and maintenance.

Axle Assembly Components

The Holland fifth wheel axle assembly includes essential components like axles, hubs, bearings, spindle, and CV joints. These parts ensure proper weight distribution and smooth trailer movement. The axles, typically made of high-strength steel, provide structural support, while hubs and bearings facilitate rotation. Regular inspections are crucial to maintain durability and prevent wear. Refer to the user manual for detailed maintenance guidelines to keep your trailer running efficiently.

Suspension System Details

The suspension system in a Holland fifth wheel trailer includes essential components like springs, shock absorbers, and air bags. These elements work together to ensure smooth towing and cargo stability. The springs absorb impacts, while shock absorbers reduce vibrations. Air bags provide load leveling and enhance ride comfort. Regular inspections are crucial to maintain performance. Refer to the Holland Fifth Wheel Parts Catalog PDF for detailed specifications and maintenance tips.

Kingpin and Related Components

The kingpin is a critical component of the Holland fifth wheel trailer assembly, acting as the central pivot point for connecting the trailer to the towing vehicle. Related parts include the kingpin bushings, shank, and locking mechanisms, which ensure secure and stable coupling during towing. Regular maintenance involves checking for wear, proper alignment, and adequate lubrication. The Holland Fifth Wheel Parts Catalog PDF provides detailed specifications for these components and their replacements, ensuring safe and reliable trailer performance.

Coupling System Explained

The coupling system is the mechanism that connects your Holland fifth wheel trailer to the towing vehicle, ensuring a secure and stable connection. It consists of components like the coupling head, shank, and locking mechanisms. Proper alignment and functionality are crucial for safe towing. The Holland Fifth Wheel Parts Catalog PDF provides detailed descriptions of these parts, helping you identify and replace them as needed for reliable performance. Regular inspection for wear and proper lubrication ensures long-lasting durability.

Ladder Frame Components

The ladder frame is a critical structural element of the Holland fifth wheel trailer, providing support and stability during towing. It consists of longitudinal rails connected by crossmembers, forming a ladder-like structure. These components are essential for maintaining the trailer’s integrity and supporting its load. The Holland Fifth Wheel Parts Catalog PDF details each part, enabling users to understand their roles and ensure proper maintenance for lasting durability and performance.

Brake System Parts

The Holland Fifth Wheel_parts_catalog_pdf includes detailed information about the brake system, which is crucial for safe trailer operation. It covers components like brake chambers, linings, drums, and adjusters, explaining their roles and maintenance requirements. Understanding these parts ensures proper braking performance and compliance with safety standards. The catalog provides specifications, diagrams, and instructions for identifying and replacing these components, helping users maintain optimal functionality and avoid potential hazards on the road;

Grease Fittings and Lubrication Points

Proper lubrication ensures smooth operation of your Holland Fifth Wheel Trailer. The catalog details critical grease fittings and lubrication points, such as the kingpin, bushings, and pivot points. It guides users on applying the right amount of grease to prevent wear and tear. Refer to the PDF for diagrams and instructions on maintaining these components to avoid malfunction and extend the trailer’s lifespan.

Holland Fifth Wheel Parts Catalog: Detailed Insights

Explore the Holland Fifth Wheel Parts Catalog PDF for detailed insights into maintenance, upgrades, and customization. The catalog offers user-friendly navigation, comprehensive diagrams, and expert recommendations. It simplifies part identification and cross-referencing, making trailer upkeep more efficient and effective.

Catalog Structure and Layout

The Holland Fifth Wheel Parts Catalog PDF is meticulously organized to enhance usability. It features a clear table of contents, indexed sections for easy navigation, and detailed part descriptions. quality images and diagrams supplement the textual information, aiding users in visualization. Cross-referencing capabilities and compatibility charts simplify part identification, while logical grouping of components streamlines the search process.

Search Functionality and Part Identification

The Holland Fifth Wheel Parts Catalog PDF offers robust search features, allowing users to locate parts quickly. Advanced search options include keywords, part numbers, and categories. Detailed descriptions and organized sections facilitate precise identification. Cross-referencing tools and filtering options enhance efficiency, ensuring accurate matches for maintenance and replacement needs.

PDF Format Features

The Holland Fifth Wheel Parts Catalog PDF offers scalable vector graphics, ensuring high-quality visuals even when zoomed in. Layers allow users to toggle between different assembly views. Text search functionality enables quick navigation, while annotations and bookmarks help organize key sections. Users can highlight important information and extract text for future reference, making this format ideal for detailed reference and planning.

Key Benefits of Using the Holland Fifth Wheel Parts Catalog PDF

Efficient maintenance, improved diagnostics, and cost savings are achievable with the Holland Fifth Wheel Parts Catalog PDF, streamlining the identification and replacement of parts for optimal trailer performance and longevity.

Time-Saving in Trailer Maintenance

The Holland Fifth Wheel Parts Catalog PDF streamlines trailer maintenance by providing quick access to part information. Mechanics can reduce downtime by referencing the catalog for exact component details. This eliminates guesswork and ensures efficient repairs. The catalog also includes compatibility data, helping professionals avoid unnecessary trial and error. Regular inspections guided by the catalog help catch issues early, preventing costly delays and downtime.

Enhanced Diagnostic Capabilities

The Holland Fifth Wheel Parts Catalog PDF enhances diagnostic capabilities by providing detailed information for quick and accurate identification of issues. Professionals can access precise specifications and compatibility details to diagnose repairs effectively. This resource improves accuracy by eliminating guesswork, ensuring the correct parts are selected for repairs. The catalog also includes valuable troubleshooting guides, making it easier to address problems promptly and efficiently.

Cost Efficiency and Inventory Management

The Holland Fifth Wheel Parts Catalog PDF offers valuable insights for cost-effective maintenance and inventory management. By providing detailed part specifications and compatibility information, it helps users avoid costly mistakes in part selection. This resource ensures proper inventory levels, reducing waste and minimizing unnecessary spending. Professionals can optimize purchasing frequencies and streamline operations, ultimately enhancing operational efficiency and reducing overall costs.

How to Use the Holland Fifth Wheel Parts Catalog PDF Effectively

Access the PDF on a computer or mobile device. Use the search function to locate specific parts. Reference diagrams and descriptions to identify compatible components and ensure accurate replacements. Organize and plan maintenance or upgrades efficiently using clear, detailed information.

Accessing the Catalog PDF

To access the Holland Fifth Wheel Parts Catalog PDF, visit the official Holland website or contact authorized dealers; The catalog is also available through online forums and professional maintenance services. Ensure you use a reliable PDF reader for optimal viewing and easy navigation. Save or bookmark the document for future reference.

Navigating Through the Catalog

The Holland Fifth Wheel Parts Catalog PDF is designed for easy navigation. Utilize the table of contents and search function to quickly locate specific information. Zoom in on diagrams and text for clarity, and bookmark frequently visited sections for future reference. Familiarize yourself with the layout to enhance efficiency while exploring the catalog.

Using the Catalog for Diagnostic Purposes

Diagnosing issues with your Holland Fifth Wheel is streamlined using the catalog. By identifying symptoms and cross-referencing them with detailed part descriptions, you can quickly pinpoint the root cause. The PDF includes diagnostic flowcharts, trouble codes, and repair procedures. Use the search functionality to locate relevant sections, ensuring efficient troubleshooting. Consult the user manual for additional guidance on resolving specific problems.

Finding the Right Replacement Parts

To locate the correct replacement parts for your Holland Fifth Wheel, consult the catalog’s organized sections. Use the search functionality to quickly find parts by name, number, or category. Cross-reference damaged components with detailed descriptions and images to avoid mismatches. Verify compatibility by checking part numbers or model-specific guides within the PDF. This ensures seamless integration and optimal performance for your trailer system.

Common Issues and Solutions When Using the Catalog

Lost parts? Contact dealers or online communities for replacements. Malfunctioning components may need professional repair or upgrade. Structural damage warrant specialized fixes. Environmental factors like corrosion require regular maintenance. Troubleshooting guides in the PDF help identify and resolve.

Lost or Missing Parts

If parts are lost or missing from your Holland Fifth Wheel, consult the catalog PDF for exact specifications. Cross-reference part numbers with authorized dealers or online forums for replacements. Keeping a maintenance log can helptrack missing components. Regular inspections and prompt action prevent critical issues. Always prioritize authenticity and compatibility to ensure proper functionality and safety.

Malfunctioning Components

When components in your Holland Fifth Wheel malfunction, consult the catalog PDF for diagnostic tips and part replacements. Identify symptoms, cross-reference with the guide, and inspect wear patterns. Lubrication issues or improper alignment may cause malfunctions. Regular maintenance and timely repairs ensure smooth functionality. Always refer to the user manual for troubleshooting and seek professional assistance if needed for safety and performance.

Structural Damage to the Fifth Wheel

Structural damage to the Holland Fifth Wheel can compromise trailer safety and functionality. Inspect the frame, coupling system, and axle assembly for signs of cracks, deformation, or excessive wear. Address issues promptly to prevent further damage. The catalog PDF provides insights for identifying and repairing structural damage. Proper alignment and maintenance are crucial to avoid progressive issues. Regular checks ensure longevity and safe towing performance.

Environmental Factors Affecting Trailer Parts

Environmental factors like weather, temperature fluctuations, and corrosion can significantly impact the Holland Fifth Wheel’s durability. The catalog PDF highlights how prolonged exposure to moisture, dust, or extreme heat can degrade components. Regular inspections are crucial to identify early signs of wear. Trailer parts may also suffer from rust or UV damage. Proper maintenance and protection measures are essential to ensure longevity and reliability under varying environmental conditions.

Maintenance Tips for Holland Fifth Wheel Parts

Regular checks and inspections are crucial for Holland Fifth Wheel parts. Ensure proper lubrication and greasing to prevent wear and tear. Replace worn components instead of repairing them for optimal performance. Keep detailed records of all maintenance activities to track the condition and lifespan of your trailer parts.

Regular Checks and Inspections

Lubrication and Greasing

Proper lubrication is crucial for maintaining the performance and longevity of your Holland Fifth Wheel parts. Follow the guidelines in the PDF catalog to identify key areas requiring greasing, such as kingpins, axles, and suspension components. Use high-quality grease compatible with your trailer’s system to ensure smooth operation. Regularly inspect and lubricate these areas to prevent wear and tear. The catalog provides detailed instructions for maintaining optimal lubrication levels, ensuring your trailer runs efficiently and safely for years to come.

Repairing vs. Replacing Parts

When deciding whether to repair or replace Holland Fifth Wheel parts, assess the extent of damage and cost-effectiveness. Minor wear or damage may be fixable with repair kits, while severe issues may necessitate replacement. The catalog provides guidelines to identify parts that need repair or replacement. Always prioritize safety and efficiency. Use the catalog to determine compatibility and ensure the correct parts are used. Sometimes, replacing worn-out components is more cost-effective in the long run, improving performance and longevity.

Keeping Records of Maintenance

Keeping detailed records of Holland Fifth Wheel maintenance is essential for ensuring optimal performance and longevity. This documentation should include dates of inspections, parts replaced, and maintenance tasks completed. Regularly updating these records helps track wear and tear, identify patterns, and plan future repairs. Proper records also serve as a reference for warranty claims, inspections, or when selling the trailer, making them a vital part of responsible ownership.

Upgrading and Customizing Your Holland Fifth Wheel

Discover how to upgrade and customize your Holland Fifth Wheel with the help of this PDF. Explore available replacement parts, steps for upgrades, compatibility during customizations, and styling enhancements to create a fully personalized trailer experience.

Replacement Parts for Upgrading

To enhance your Holland Fifth Wheel’s performance, explore the wide variety of replacement parts available for upgrading. From upgrading your axle assembly to improving the suspension, every component is designed to meet specific needs. You can find these parts through official dealers, online platforms, or the Holland website. Upgrading ensures compatibility and allows for improved functionality. Shop smart and upgrade your trailer for better performance and reliability.

Steps to Upgrade Your Fifth Wheel

To upgrade your Holland Fifth Wheel, start by reviewing your trailer’s current setup and identifying areas for improvement. Consult the Holland Fifth Wheel Parts Catalog PDF to find compatible replacement components. Purchase the necessary parts from authorized dealers or online platforms. Follow the installation instructions carefully to ensure proper assembly. Test the upgraded system to confirm optimal functionality. Always refer to the catalog for detailed specs and compatibility. Visit the Holland website for support or additional resources.

Ensuring Compatibility During Upgrades

To ensure compatibility during Holland Fifth Wheel upgrades, thoroughly review the parts catalog PDF to match specifications. Cross-reference components with the trailer’s model and year to guarantee fitment. Follow manufacturer guidelines and avoid mixing incompatible parts. Verify dimensions, weight limits, and assembly requirements. Consult with authorized dealers or professionals when uncertain. Always prioritize compatibility to maintain functionality and safety. Regularly update your knowledge of compatible upgrades through the catalog and Holland’s official resources.

Care After an Upgrade

After upgrading your Holland Fifth Wheel, consult the parts catalog PDF to ensure proper care. Regularly inspect upgraded components for wear or damage. Maintain lubrication points as specified to prevent premature wear. Monitor for signs of stress or misalignment caused by environmental factors. Record upgrade details for future reference and schedule routine inspections. Always adhere to manufacturer guidelines to maximize performance and safety.

Customizing Your Holland Fifth Wheel

Transform your Holland Fifth Wheel with customizable parts to suit your style. Enhance aesthetics and functionality while ensuring compatibility with your trailer’s design. Explore the PDF catalog to find options for styling and upgrading your fifth wheel to match your preferences and needs.

Custom Parts Availability

The Holland Fifth Wheel Parts Catalog PDF offers a wide range of custom parts to enhance your trailer’s functionality and aesthetics. From specialized components to tailored upgrades, the catalog ensures availability for various customization needs. Explore options for aesthetic modifications and functional improvements, all while ensuring compatibility with your existing setup. Access to this PDF provides detailed information on available parts and their specifications, helping you make informed decisions for your customization projects.

Ensuring Compatibility for Customization

Customization of your Holland Fifth Wheel requires careful consideration to maintain compatibility. The Holland Fifth Wheel Parts Catalog PDF provides detailed specifications and guidelines to ensure custom parts align with your trailer’s design and functionality. By referencing the catalog, you can select compatible components that enhance performance without compromising safety or efficiency. Always consult the PDF for precise compatibility details and supplement with expert advice when necessary to prevent potential issues during modifications. This ensures your customizations are both functional and tailored to your preferences.

Styling and Aesthetic Enhancements

Enhancing the styling of your Holland Fifth Wheel involves selecting parts that reflect personal style while maintaining functionality. The Holland Fifth Wheel Parts Catalog PDF offers a variety of options for upgrading exteriors, such as custom paint jobs, decals, and LED lighting. Interior aesthetics can be improved with stylish upholstery and modern fixtures. By incorporating these elements, you can create a cohesive and visually appealing design that complements your trailer’s purpose. Refer to the catalog for compatible and stylish parts to achieve a polished, modern look.

Finishing Touches

Adding finishing touches to your Holland Fifth Wheel ensures a polished and professional appearance. Consider installing LED lighting or decorative trim to enhance curb appeal. Apply protective covers to vulnerable components to prevent damage. Review the Holland Fifth Wheel Parts Catalog PDF for compatible accessories to complete your customization. These details elevate functionality and aesthetics, ensuring your trailer stands out.

Where to Find the Holland Fifth Wheel Parts Catalog PDF

Access the Holland Fifth Wheel Parts Catalog PDF through the official website, authorized dealers, online forums, and professional trailer maintenance services for comprehensive part details and troubleshooting guidance.

Official Holland Website

The official Holland website offers direct access to the Holland Fifth Wheel Parts Catalog PDF. Users can easily download or view the catalog, ensuring they receive the most accurate and updated information. The catalog is available in multi-format, allowing seamless navigation and detailed exploration of the product line. Verify compatibility and locate specific parts efficiently through this trusted resource, ensuring secure and reliable access to essential documentation.

Authorized Dealer Networks

Authorized Holland dealer networks provide authorized access to the Holland Fifth Wheel Parts Catalog PDF, ensuring customers receive genuine and compatible replacement parts. Dealers offer expert assistance in interpreting the catalog, helping users locate specific components and verify compatibility with their trailers. Through dealer networks, users can also access exclusive tools and resources for efficient trailer maintenance. The catalog is often used in conjunction with dealer services to streamline repairs and upgrades. These networks guarantee reliable and trustworthy support for Holland fifth wheel owners.

Online Forums and Communities

Online forums and communities are valuable resources for Holland fifth wheel owners seeking assistance with the Holland Fifth Wheel Parts Catalog PDF. Members often share insights, troubleshooting tips, and maintenance strategies. These platforms allow users to discuss specific parts, share experiences, and ask for advice. Participants can also locate the catalog PDF or discuss updates to it, making them a vital part of the Holland fifth wheel owner community.

Professional Trailer Maintenance Services

Professional trailer maintenance services utilize the Holland Fifth Wheel Parts Catalog PDF to ensure accurate and efficient repairs. These experts can quickly identify and order necessary parts, minimizing downtime. They also provide guidance on proper installation and maintenance procedures. By leveraging the catalog, professionals ensure that your trailer remains in optimal working condition, extending its longevity and performance.

Byakeem

troy-bilt service manual pdf free download

A Troy-Bilt service manual is a comprehensive guide for understanding and maintaining your equipment. It provides detailed instructions‚ parts diagrams‚ and troubleshooting tips‚ available as a free PDF download.

What is a Troy-Bilt Service Manual?

A Troy-Bilt service manual is a detailed guide designed to help users understand‚ maintain‚ and repair their equipment. It contains essential information about the product’s features‚ operation‚ and technical specifications. Whether you own a lawn mower‚ tractor‚ or snow blower‚ the manual provides a comprehensive overview of how to get the most out of your machine. It includes parts diagrams‚ troubleshooting tips‚ and step-by-step instructions for common repairs and maintenance tasks. Available as a free PDF download‚ the manual is an invaluable resource for both novice and experienced users. By referring to the manual‚ you can ensure your equipment runs efficiently‚ prolong its lifespan‚ and address issues before they escalate. It’s a must-have for anyone looking to master their Troy-Bilt equipment.

Why You Need a Service Manual for Your Troy-Bilt Equipment

Owning a Troy-Bilt service manual is essential for maximizing the performance and longevity of your equipment. It provides detailed instructions for maintenance‚ repairs‚ and troubleshooting‚ ensuring you can address issues promptly. With a service manual‚ you gain a deeper understanding of your equipment’s inner workings‚ allowing you to perform DIY repairs confidently. This not only saves money on professional services but also helps prevent costly damages by catching problems early. Additionally‚ the manual ensures compliance with warranty requirements‚ avoiding potential voids. By having a Troy-Bilt service manual‚ you empower yourself to keep your equipment running smoothly‚ safely‚ and efficiently. It’s a vital resource for any homeowner or professional relying on Troy-Bilt tools for landscaping or yard care tasks.

Benefits of Using a Troy-Bilt Service Manual

A Troy-Bilt service manual enhances your understanding of equipment capabilities‚ enabling DIY repairs and warranty compliance. It ensures optimal performance‚ extends lifespan‚ and saves costs through proper maintenance.

Understanding Your Equipment’s Capabilities

A Troy-Bilt service manual provides a detailed overview of your equipment’s features‚ specifications‚ and operational limits. By understanding these aspects‚ you can maximize efficiency and safety. The manual outlines the intended use of each component‚ ensuring you operate the equipment within its design parameters. This knowledge helps prevent misuse‚ which can lead to premature wear or damage. Additionally‚ the manual highlights the equipment’s capacity for various tasks‚ allowing you to make informed decisions about its application. Whether it’s a lawn tractor‚ snow blower‚ or tiller‚ the manual empowers you to harness its full potential while maintaining safety and performance. This understanding is crucial for both novice and experienced users‚ ensuring optimal results and extending the equipment’s lifespan.

DIY Repairs and Maintenance

A Troy-Bilt service manual is an invaluable resource for DIY repairs and maintenance. It provides step-by-step instructions for common fixes‚ allowing you to address issues without professional help. Detailed parts diagrams help identify components‚ making it easier to order replacements. The manual also outlines routine maintenance tasks‚ such as oil changes and blade sharpening‚ to keep your equipment running smoothly. By following the guide‚ you can save money on repair costs and extend the lifespan of your Troy-Bilt equipment. Additionally‚ the manual includes safety precautions to ensure your repairs are done correctly and safely. Whether you’re a seasoned DIYer or a beginner‚ the manual empowers you to take control of your equipment’s upkeep‚ fostering self-sufficiency and confidence in handling repairs and maintenance effectively.

Warranty and Compliance Information

The Troy-Bilt service manual provides essential details about warranty coverage and compliance requirements for your equipment. It outlines the terms and conditions of the manufacturer’s warranty‚ ensuring you understand what is covered and for how long. Additionally‚ the manual includes information on how to register your product and maintain warranty validity. Compliance details are also provided‚ ensuring your equipment meets safety and regulatory standards. By adhering to the guidelines in the manual‚ you can avoid voiding the warranty and ensure your equipment operates within legal and safety parameters. This section is crucial for protecting your investment and ensuring long-term reliability. The manual also offers guidance on how to handle warranty claims and provides contact information for manufacturer support. Staying informed about warranty and compliance ensures peace of mind and proper equipment maintenance.

How to Download a Troy-Bilt Service Manual PDF for Free

Visit the official Troy-Bilt website or trusted third-party sites like ManualsLib. Search for your specific model‚ and download the PDF manual without any cost or registration.

Official Sources for Troy-Bilt Manuals

The official Troy-Bilt website is the most reliable source for downloading service manuals. Visit their support section‚ enter your equipment model number‚ and access the PDF manual for free. Additionally‚ authorized dealers and manufacturer portals often provide direct links to download these resources. Ensure you verify the authenticity of the source to avoid unauthorized or outdated versions. Official manuals are typically well-organized‚ containing detailed parts diagrams‚ troubleshooting guides‚ and maintenance schedules. They are designed to help users optimize their equipment’s performance and extend its lifespan. Always prioritize official sources for accuracy and compliance with manufacturer standards.

Third-Party Websites and Forums

Beyond official sources‚ third-party websites and forums offer alternative access to Troy-Bilt service manuals. Platforms like forums dedicated to outdoor equipment or DIY communities often share PDF manuals uploaded by users. Websites specializing in repair manuals may also host free downloads. While these sources can be convenient‚ exercise caution to ensure the files are genuine and free from malware. Some forums provide step-by-step guides and troubleshooting tips shared by experienced users‚ adding value beyond the manual itself. However‚ always verify the credibility of the source and cross-check information with official documentation to maintain accuracy. These platforms can be a helpful supplement but should not replace the manufacturer’s authorized resources.

Steps to Download the Manual

To download a Troy-Bilt service manual‚ start by visiting the official Troy-Bilt website or authorized third-party sources. Use the search bar to enter your equipment’s model number or name. Select the appropriate manual from the results. Ensure the file format is PDF for easy access. Click the download button and wait for the process to complete. Some sites may require creating a free account or verifying your email. Once downloaded‚ open the PDF to access detailed instructions‚ diagrams‚ and troubleshooting guides. Always verify the manual’s authenticity to avoid incorrect or unsafe information. Follow these steps to ensure a smooth and secure download experience.

What to Expect Inside the Troy-Bilt Service Manual

A Troy-Bilt service manual offers a comprehensive guide‚ including detailed parts diagrams‚ installation instructions‚ troubleshooting tips‚ and maintenance schedules to help you optimize your equipment’s performance effectively.

Parts Diagrams and Illustrations

The Troy-Bilt service manual includes detailed parts diagrams and illustrations that visually guide users through equipment components and assemblies. These diagrams are essential for understanding how parts interact and function within the machine. They provide a clear and precise breakdown of each component‚ making it easier to identify and locate specific parts during repairs or maintenance. The illustrations are often color-coded and labeled‚ ensuring clarity and ease of use. Whether you’re diagnosing an issue or planning a DIY repair‚ these visual aids are indispensable. They help users avoid costly mistakes by ensuring the correct parts are used and installed properly. The diagrams also serve as a reference for reassembling components after maintenance or repairs‚ making the process more efficient and stress-free. This visual guidance is a cornerstone of the manual’s effectiveness in helping users master their equipment.

Installation and Assembly Instructions

The Troy-Bilt service manual provides detailed installation and assembly instructions to help users set up and configure their equipment correctly. These guides are designed to ensure a smooth and efficient process‚ whether you’re assembling a new machine or reinstalling parts after maintenance. The manual includes step-by-step directions‚ often accompanied by diagrams and exploded views‚ to clarify each stage of the process. By following these instructions‚ users can avoid common mistakes and ensure their equipment operates at peak performance. The guides also cover proper tool usage and workspace preparation‚ making the assembly process safer and more manageable. Whether you’re a novice or an experienced user‚ the installation and assembly instructions empower you to handle the setup with confidence and precision‚ ensuring your Troy-Bilt equipment is ready for optimal use.

Troubleshooting Common Issues

The Troy-Bilt service manual includes a dedicated section for troubleshooting common issues‚ helping users identify and resolve problems efficiently. This section provides detailed symptom-based diagnosis‚ allowing you to pinpoint the root cause of malfunctions. From engine issues to blade problems‚ the manual offers step-by-step solutions and practical repair advice. It also includes visual guides and diagrams to help you understand complex systems better. Whether your equipment is underperforming or has stopped working entirely‚ the troubleshooting guide equips you with the knowledge to address the problem confidently. Additionally‚ the manual often lists error codes and their meanings‚ making it easier to identify and fix issues quickly. By following the troubleshooting steps‚ you can restore your Troy-Bilt equipment to optimal performance without the need for professional assistance‚ saving time and money.

Maintenance Schedules and Tips

The Troy-Bilt service manual provides detailed maintenance schedules and practical tips to keep your equipment in top condition. It outlines routine checks‚ seasonal preparations‚ and storage guidelines to ensure longevity. Regular maintenance tasks‚ such as oil changes‚ blade sharpening‚ and filter cleaning‚ are clearly explained. The manual also offers advice on how to prepare your equipment for different weather conditions and storage periods. By following the recommended schedules‚ you can prevent potential issues and maintain optimal performance. Additionally‚ the guide includes tips for inspecting and replacing worn parts‚ ensuring your Troy-Bilt equipment runs efficiently year-round. These maintenance schedules and tips are designed to help you maximize productivity and extend the lifespan of your machinery‚ saving you time and money in the long run.

Troubleshooting Your Troy-Bilt Equipment

The Troy-Bilt service manual helps diagnose and resolve common issues with your equipment. It provides step-by-step solutions and practical advice to get your machinery running smoothly again.

Identifying Common Problems

The Troy-Bilt service manual is an essential resource for identifying common issues with your equipment. It outlines frequent problems‚ such as engine startup difficulties‚ faulty cutting blades‚ or malfunctioning transmissions. By referencing the manual‚ you can quickly diagnose issues based on symptoms and error codes. Detailed troubleshooting sections guide you through identifying worn or damaged parts‚ ensuring accurate repairs. The manual also provides clear instructions for checking fluid levels‚ air filters‚ and other critical components that may cause operational issues. With its comprehensive problem-solving guides‚ the Troy-Bilt service manual empowers you to address and resolve common problems efficiently‚ minimizing downtime and extending the lifespan of your equipment. This makes it an indispensable tool for maintaining peak performance and reliability.

Using the Manual for Diagnostic Purposes

The Troy-Bilt service manual is a valuable tool for diagnosing issues with your equipment. It provides detailed troubleshooting guides‚ helping you identify problems based on symptoms and error codes. The manual includes step-by-step diagnostic procedures‚ allowing you to systematically check components like engines‚ transmissions‚ and hydraulic systems. With clear instructions and visual aids‚ such as wiring diagrams and parts illustrations‚ you can pinpoint faults accurately. The manual also offers guidance on testing and inspecting critical systems‚ ensuring you address the root cause of the issue. By following the diagnostic steps outlined‚ you can resolve problems efficiently and avoid unnecessary repairs. This makes the manual an essential resource for maintaining your equipment’s performance and extending its lifespan. Regular use of the manual ensures your Troy-Bilt equipment operates at its best‚ minimizing downtime and repair costs.

Safety Precautions When Servicing Your Troy-Bilt Equipment

Always wear protective gear and disconnect power before servicing. Follow manual instructions carefully to ensure safety and prevent accidents during repairs. Adhere to guidelines to protect yourself and ensure proper repair.

General Safety Guidelines

When servicing your Troy-Bilt equipment‚ always prioritize safety. Wear protective gear‚ including gloves and safety glasses‚ to prevent injuries. Ensure the machine is turned off and disconnected from any power source before starting repairs. Use proper tools and follow the manual’s instructions to avoid accidents. Keep loose clothing and long hair tied back to prevent entanglement. Work in a well-ventilated area‚ especially when handling chemicals or fuels. Never smoke or use open flames near flammable materials. Keep children and pets away from the workspace. Familiarize yourself with emergency procedures‚ such as fire extinguisher locations‚ in case of unexpected situations. By adhering to these guidelines‚ you can ensure a safe and effective servicing process for your Troy-Bilt equipment.

Precautions Before Starting Repairs

Before beginning any repairs on your Troy-Bilt equipment‚ take essential precautions to ensure safety and avoid damage. Disconnect the battery and drain fuel lines to prevent accidental startups or leaks. Relieve pressure from hydraulic or pneumatic systems to avoid sudden releases. Use jack stands or wheel chocks to stabilize heavy machinery and prevent movement during repairs. Inspect for worn or damaged parts that may require additional attention. Always consult the service manual for specific instructions tailored to your model. Ensure the workspace is clear of clutter and flammable materials. Keep a fire extinguisher nearby and avoid smoking. By following these steps‚ you can minimize risks and ensure a smooth repair process. Proper preparation is key to safe and effective maintenance of your Troy-Bilt equipment.

Additional Resources for Troy-Bilt Owners

Explore official manufacturer support‚ online forums‚ and communities for additional guides‚ troubleshooting tips‚ and expert advice tailored to Troy-Bilt equipment owners.

Manufacturer Support and Customer Service

Troy-Bilt provides dedicated customer support through their official website‚ offering resources like manuals‚ FAQs‚ and contact information. Users can access live chat‚ phone support‚ or email assistance for troubleshooting and repair guidance. The manufacturer ensures comprehensive assistance‚ helping owners maintain and repair their equipment effectively. This support complements the service manual‚ ensuring users have all the tools needed for optimal performance and longevity of their Troy-Bilt products.

Online Communities and Forums

Online communities and forums are invaluable resources for Troy-Bilt users seeking advice‚ troubleshooting tips‚ and shared experiences. Platforms like Reddit‚ gardening forums‚ and specialized equipment groups often feature discussions about Troy-Bilt products. Users can ask questions‚ share repair experiences‚ and gain insights from seasoned operators. These communities foster collaboration and problem-solving‚ helping owners optimize their equipment’s performance. While not a replacement for the official service manual‚ forums provide real-world perspectives and practical solutions. They are especially useful for DIY enthusiasts and those looking for peer-reviewed advice. By engaging with these communities‚ Troy-Bilt owners can enhance their understanding and maintenance of their equipment‚ ensuring longevity and efficiency. These forums complement the official resources‚ offering a user-driven approach to troubleshooting and maintenance.

The Troy-Bilt service manual is essential for maintaining and repairing your equipment. It offers clear instructions‚ diagrams‚ and troubleshooting tips. Download it for free to ensure optimal performance.

Final Thoughts on Using the Troy-Bilt Service Manual

Using a Troy-Bilt service manual empowers you to maintain and repair your equipment effectively. It provides detailed guidance‚ ensuring optimal performance and longevity. The manual’s clear instructions and diagrams make DIY repairs accessible‚ while troubleshooting tips help resolve common issues quickly. By following the maintenance schedules‚ you can prevent breakdowns and keep your equipment running smoothly. Additionally‚ the manual’s focus on safety ensures that repairs are conducted responsibly. With the ability to download the manual for free‚ you have instant access to essential information. Whether you’re a seasoned user or a newcomer‚ the Troy-Bilt service manual is an invaluable resource for maximizing your equipment’s potential. It’s a must-have for anyone looking to take control of their equipment’s care and operation.

Byakeem

brother mfc l2710dw manual

Welcome to the Brother MFC-L2710DW manual, your comprehensive guide to setting up, operating, and maintaining this versatile all-in-one laser printer. Designed for small offices, it offers printing, copying, scanning, and faxing capabilities, along with advanced features like wireless connectivity and mobile printing options. This manual provides detailed instructions for troubleshooting common issues, performing routine maintenance, and optimizing printer performance to ensure seamless functionality.

1.1 Overview of the Printer and Its Features

The Brother MFC-L2710DW is a monochrome laser all-in-one printer designed for small offices or home-based workgroups. It offers printing, copying, scanning, and faxing capabilities, with a maximum duty cycle of 15,000 pages per month. The printer supports wireless and wired network connectivity, allowing seamless integration into office environments. It features a print resolution of up to 2400 x 600 dpi and prints at speeds of up to 34 pages per minute. The MFC-L2710DW also includes a 50-sheet automatic document feeder and a 250-sheet paper tray, ensuring efficient document handling. With mobile printing options via Brother’s iPrint&Scan app, this printer is versatile and user-friendly, catering to diverse printing needs.

1.2 Importance of Reading the Manual

Reading the Brother MFC-L2710DW manual is essential for understanding its setup, operation, and maintenance. It provides detailed instructions for troubleshooting common issues, such as error messages or connectivity problems, ensuring optimal performance. The manual also guides users through advanced features like wireless network setup and mobile printing, helping to maximize productivity. By following the manual, users can avoid potential pitfalls, such as incompatible toner cartridges or improper installation, which may lead to hardware issues. Additionally, it offers maintenance tips to extend the printer’s lifespan. Referencing the manual regularly ensures users can fully utilize the printer’s capabilities and resolve problems efficiently, making it a vital resource for both beginners and experienced users.

Installation and Setup Guide

This guide covers unboxing, physical setup, connecting to power, installing drivers, and wireless network configuration for the Brother MFC-L2710DW printer, ensuring a smooth setup experience.

2.1 Unboxing and Physical Setup

Begin by carefully unboxing the Brother MFC-L2710DW printer, ensuring all components, such as the toner cartridge, power cord, and manual, are included. Place the printer on a flat, stable surface, allowing adequate space for proper ventilation. Remove all packaging materials and protective covers from the printer and accessories. Next, install the drum unit and toner cartridge by following the instructions provided in the manual. Load the paper tray with compatible paper, ensuring it is aligned correctly. Finally, connect the power cord to a nearby outlet and press the power button to turn on the printer. Refer to the manual for specific setup instructions to ensure proper installation and functionality.

2.2 Connecting the Printer to a Power Source

To power on your Brother MFC-L2710DW, locate the power cord provided in the box. Plug one end of the cord into the printer’s power port, located on the rear, and the other into a nearby electrical outlet. Ensure the connection is secure to avoid any loose contacts. Avoid using extension cords or power strips, as they may cause instability. Once connected, press the power button on the control panel. The printer will initialize, and the LED lights will illuminate, indicating it is ready for use. For added protection, consider using a surge protector to safeguard against power fluctuations. Always verify that the outlet is functioning properly before connecting the printer.

2.3 Installing Printer Drivers and Software

To ensure optimal performance, install the latest Brother MFC-L2710DW drivers and software from the official Brother support website. Visit the site, enter your printer model, and select your operating system. Download the full driver and software package, which includes the printer driver, scanner driver, and additional utilities like ControlCenter4. For Windows users, run the downloaded installer and follow the on-screen instructions. Mac users can download the Brother iPrint&Scan app from the Mac App Store for wireless printing and scanning. After installation, restart your printer and computer to complete the setup. This ensures all features, including wireless connectivity, function properly.

Basic Operations

The Brother MFC-L2710DW supports essential functions like printing, copying, scanning, and faxing. Use the control panel for quick access to these features, ensuring efficient daily operations.

3.1 Printing Documents

Printing documents with the Brother MFC-L2710DW is straightforward. Ensure paper is loaded in the tray, select the printer in your device settings, and choose desired print options. For wireless printing, connect the printer to your network using the control panel or Brother iPrint&Scan app. The printer supports monochrome printing at high resolution, ideal for text documents. Use genuine Brother toner cartridges for optimal print quality. Adjust settings like paper size and orientation in the printer driver. Troubleshoot common issues like paper jams or poor quality by referring to the manual or Brother support resources. This ensures efficient and reliable printing for home or office use.

3.2 Copying Files

To copy files using the Brother MFC-L2710DW, place the document on the scanner glass or face up in the ADF. Use the control panel to select the copy function and adjust settings like copy quality, brightness, and contrast. The printer supports monochrome copying with high resolution, ensuring sharp text and images. For multiple copies, set the desired quantity and press Start. Troubleshoot issues like blurry copies by cleaning the scanner glass or checking for debris. Refer to the manual for detailed instructions or contact Brother support for assistance. This feature is ideal for quick and efficient document duplication in office or home environments.

3.3 Scanning Documents

To scan documents using the Brother MFC-L2710DW, place the document face down on the scanner glass or in the automatic document feeder (ADF). Use the control panel to select the scan option and choose your preferred settings, such as resolution, file format (e.g., PDF, JPEG, or TIFF), and destination. You can scan directly to a computer, email, or cloud services like Dropbox or Google Drive. For wireless scanning, use the Brother iPrint&Scan app on your mobile device. Adjust brightness and contrast as needed for optimal image quality. Scanned files can be saved to designated folders or sent to predefined locations. Troubleshoot scanning issues by cleaning the scanner glass or checking for debris. Refer to the manual for detailed scanning instructions and troubleshooting tips.

3.4 Sending and Receiving Faxes

To send a fax using the Brother MFC-L2710DW, dial the recipient’s fax number using the keypad and press Start. Place the document face down on the scanner glass or in the ADF. For receiving faxes, ensure the printer is in Fax mode. You can set up automatic fax reception or manually receive faxes by pressing Start when you hear the fax tone. Adjust fax settings, such as resolution and contrast, for clarity. Use the control panel to access advanced fax features like speed dial or delayed sending. Troubleshoot fax issues by checking the phone line connection or ensuring the printer is configured correctly. Refer to the manual for detailed fax setup and troubleshooting guidance.

Advanced Features

The Brother MFC-L2710DW offers advanced features like wireless network setup, mobile printing via Brother iPrint&Scan, and robust security options to protect sensitive data and ensure secure printing.

4.1 Wireless Network Setup

Setting up the Brother MFC-L2710DW on a wireless network enables convenient printing, scanning, and faxing from mobile devices. To begin, access the printer’s menu, select the wireless setup option, and follow on-screen instructions to connect to your Wi-Fi network. Ensure your router is nearby and your network name (SSID) is correctly entered. For added convenience, use the Brother ControlCenter4 utility to configure wireless settings from your computer. The printer supports WEP, WPA, and WPA2 security protocols to safeguard your connection. If issues arise, refer to the manual or Brother’s online support for troubleshooting guides; A stable wireless connection is essential for optimal performance.

4.2 Mobile Printing Options

The Brother MFC-L2710DW supports mobile printing through the Brother iPrint&Scan app, available for iOS and Android devices. This app allows users to print documents, photos, and web pages directly from their smartphones or tablets. Additionally, the printer is compatible with AirPrint and Google Cloud Print, enabling seamless printing from Apple and Android devices without requiring additional setup. For direct device-to-printer connections, Wi-Fi Direct is also supported, eliminating the need for a router. These mobile printing options enhance productivity, offering flexibility and convenience for users who need to print on the go. Ensure your printer and mobile device are connected to the same network for optimal functionality;

4.3 Security Features

The Brother MFC-L2710DW incorporates robust security features to protect your data and ensure secure printing. Secure Print allows you to encrypt print jobs with a PIN, preventing unauthorized access to sensitive documents. Additionally, the printer supports SSL/TLS encryption for secure communication over networks. Administrator settings enable password protection for critical functions, such as fax and network configurations, to prevent unauthorized changes. The printer also includes access controls, allowing you to restrict usage to specific users or groups. These features ensure that your printer remains secure, safeguarding your documents and maintaining the integrity of your office network. Regular firmware updates further enhance security by addressing potential vulnerabilities.

Maintenance and Troubleshooting

Regular maintenance ensures optimal performance. Reset the printer to resolve issues, check error messages for specific problems, and consult the manual or Brother support for troubleshooting guidance.

5.1 Routine Maintenance Tasks

Regular maintenance is crucial for optimal performance. Reset the printer to clear internal memory, addressing issues like “Out of Memory” messages. Clean toner residue using compressed air, ensuring no debris remains. Check and update firmware via Brother’s support website to enhance functionality and fix bugs. Use genuine Brother toner and drum units to maintain quality and prevent chip-related errors; Refer to the manual for specific reset procedures, such as resetting the drum counter when replacing drums. Routine checks for error messages and updating drivers ensure smooth operation. These tasks help prevent hardware issues and extend the printer’s lifespan, keeping it efficient for daily use.

5.2 Replacing Toner and Drum Units

To replace the toner cartridge, turn off the printer, open the front cover, and pull out the drum unit assembly. Remove the toner cartridge from the drum unit, then insert the new toner, ensuring it clicks into place. Reattach the drum unit and close the front cover. For the drum unit, press Menu, select 8 (Machine Info), then 4 (Reset Parts Life) to reset the counter. Always use genuine Brother parts to avoid compatibility issues. Resetting the drum counter is essential when replacing it to ensure proper functionality. Properly dispose of used toner and drum units to maintain environmental standards.

5.3 Common Error Messages and Solutions

The Brother MFC-L2710DW may display error messages like “Out of Memory,” “Manual Feed,” or “Change Toner.” For “Out of Memory,” restart the printer or reduce the print job size. If “Manual Feed” appears, ensure paper is loaded in the manual feed slot. The “Change Toner” message indicates low toner levels; replace the cartridge if necessary. Other errors, such as paper jams, can be resolved by turning off the printer, allowing it to cool, and carefully removing any obstructions. Always refer to the manual or Brother support for specific troubleshooting steps, as some errors may require firmware updates or professional assistance.

Technical Specifications

The Brother MFC-L2710DW is a monochrome laser printer with a monthly duty cycle of 15,000 pages, supporting wireless and mobile printing for enhanced connectivity and efficiency.

6.1 Print Resolution and Speed

The Brother MFC-L2710DW delivers crisp monochrome prints with a resolution of up to 2400 x 600 dpi, ensuring sharp text and detailed graphics. It offers impressive print speeds of up to 34 pages per minute (ppm), making it efficient for high-volume tasks. The first print out time is approximately 8.5 seconds, reducing wait time for urgent documents. With a monthly duty cycle of 15,000 pages, this printer is ideal for small to medium-sized offices. Its robust performance and high-quality output make it a reliable choice for professional environments, balancing speed and precision to meet everyday printing demands effectively.

6.2 Scan and Fax Capabilities

The Brother MFC-L2710DW offers versatile scanning and faxing features, enhancing office productivity. It supports color scanning with a resolution of up to 19200 x 19200 dpi, allowing for detailed and vibrant outputs. Users can scan documents to email, cloud services, or network folders, making it easy to share and store files digitally. The fax function operates at a fast 14.4 Kbps transmission speed, with support for up to 200 speed dials for quick access to frequently used numbers. Additionally, the printer is compatible with Brother’s iPrint&Scan app, enabling mobile scanning and printing. These features make it an efficient all-in-one solution for modern office needs.

6.3 Paper Handling and Compatibility

The Brother MFC-L2710DW is designed to handle a variety of paper types and sizes, ensuring versatility for different printing needs. It features a 250-sheet standard paper capacity, with an optional 250-sheet tray for expanded capacity. The printer supports letter, legal, executive, and folio sizes, as well as envelopes and labels. It also includes a 50-sheet multipurpose tray for specialty papers. The automatic document feeder (ADF) accommodates up to 50 sheets for scanning and copying. The printer supports duplex printing, allowing for automatic two-sided printing. With compatibility for a range of paper weights, including thin, plain, and thick paper, this printer is ideal for diverse office requirements.

Warranty and Support Information

The Brother MFC-L2710DW comes with a limited warranty covering parts and labor. For support, visit Brother’s official website for FAQs, troubleshooting guides, and contact options. Genuine Brother products are recommended for optimal performance and warranty validity.

7.1 Understanding Your Warranty

The Brother MFC-L2710DW is backed by a limited warranty that covers parts and labor for a specified period. This warranty ensures protection against manufacturing defects, providing peace of mind for users. It is essential to review the warranty terms to understand what is covered and for how long. Additionally, using genuine Brother toner cartridges and drum units is recommended, as non-genuine products may void the warranty. For detailed warranty information, refer to the official Brother website or the printed manual provided with your printer. Understanding your warranty helps you make informed decisions and ensures optimal performance and support for your device.

7.2 Contacting Brother Support

For assistance with your Brother MFC-L2710DW, visit the official Brother Support website, where you can find FAQs, troubleshooting guides, and model-specific resources. Use the “Search by Model Name” feature to locate detailed support for your printer. Additionally, Brother offers various contact options, including phone, email, and live chat, to address technical issues or general inquiries. Ensure to have your printer’s serial number ready for efficient support. Brother also provides downloadable tools, such as the ControlCenter4 Update Tool, to resolve common problems. For the best experience, always use genuine Brother parts and refer to the official manual for guidance.

The Brother MFC-L2710DW manual serves as a complete resource for optimizing your printer’s performance. From initial setup to advanced features, this guide ensures you maximize the printer’s capabilities. Troubleshooting tips and maintenance advice help extend its lifespan. Refer to the technical specifications and warranty details for a comprehensive understanding. By following the manual, you can resolve common issues and enjoy reliable printing, copying, scanning, and faxing. For further assistance, Brother Support is readily available. This manual empowers you to make the most of your Brother MFC-L2710DW, ensuring efficiency and productivity in your home or office environment.

Byakeem

alto saxophone altissimo finger chart pdf

The altissimo register on the alto saxophone refers to the high notes above the staff, typically starting from E and extending beyond. These notes add brightness and complexity to music, requiring precise fingerings and embouchure control. Mastering this range enhances musical expression and technical versatility, making it a key focus for advanced saxophonists.

What is the Altissimo Register?

The altissimo register on the alto saxophone refers to the high notes above the staff, typically starting from E and extending into the upper range of the instrument. These notes are produced using specific fingerings and embouchure techniques, allowing saxophonists to access pitches that add brightness and complexity to their playing. The altissimo register is not just about playing high notes; it also involves achieving proper intonation, tone quality, and control; While challenging to master, this range is essential for advanced repertoire and improvisation. Finger charts are invaluable tools for navigating these notes, as they provide clear guidance on finger placements and alternatives to suit different musical contexts and saxophone setups.

Importance of Altissimo Finger Charts

Altissimo finger charts are essential tools for saxophonists aiming to master the high register of their instrument. These charts provide clear, visual representations of finger placements for notes above the staff, helping players achieve accurate intonation and tone. They are particularly useful for understanding the complex fingerings required to produce these high pitches consistently. Additionally, finger charts often include alternative fingerings, which can be crucial for navigating fast passages or achieving specific tonal colors. By offering a structured approach, they help musicians build confidence and precision in the altissimo range. Whether for practice, performance, or exploration, these charts serve as invaluable guides for unlocking the full potential of the alto saxophone’s upper register.

Understanding the Alto Saxophone Altissimo Finger Chart

The altissimo finger chart is a visual guide detailing finger placements for high notes above the staff. It includes standard and alternative fingerings, ensuring accurate intonation and tone.

Structure of the Chart

The altissimo finger chart is organized to clearly present fingerings for high notes above the staff. It typically includes notes from E upwards, with each note accompanied by one or more fingerings. The chart often lists a primary fingering and alternatives, which may vary based on the saxophone’s make or the player’s preference. Some charts also indicate split-tone fingerings, which can produce unique tonal effects. The layout usually progresses chromatically, covering all keys within the altissimo register. Visual cues, such as diagrams or annotations, help clarify complex finger placements. This structured approach ensures players can quickly identify the most suitable fingering for their instrument and musical context, making it an essential tool for mastering high-range playing.

Key Notes and Fingerings

The altissimo register typically begins at E and extends to high F#, G, A, B, and C. Each note has specific fingerings, often with primary and alternative options. For example, E is usually played with the first finger of the left hand on the octave key and the first finger of the right hand on the lower trill key. F and F# may involve additional keys for pitch accuracy. G and A often require precise finger placement on the upper keys, while B and C may use alternate fingerings for better intonation. Some charts highlight fingerings that produce split tones or facilitate fast passages. These fingerings vary slightly across saxophone models, making the chart adaptable to different instruments and player preferences.

Common Challenges and Solutions

Mastering the altissimo register presents challenges, including pitch accuracy, tone consistency, and finger dexterity. Many players struggle with intonation, especially on notes like high F and G, which tend to be sharp. To address this, using alternate fingerings or adjusting embouchure can help. Another issue is finger coordination for complex passages, which requires targeted exercises. Additionally, reed strength and mouthpiece setup significantly impact altissimo performance; a harder reed often provides better control. Equipment differences, such as the presence of a high F key, can also affect fingering choices. Regular practice with long tones and scales, along with studying finger charts, helps overcome these challenges and improves overall mastery of the altissimo range.

Basic Fingerings for Altissimo Notes

Basic fingerings for altissimo notes provide a foundation for playing high-range notes clearly and accurately. Starting with E and F, these fingerings are essential for building control and tone consistency.

Fingering for E and F

The fingering for E and F in the altissimo register is foundational for alto saxophonists. For E, the primary fingering involves the first finger of the left hand on the octave key and the first finger of the right hand on the F key. This setup ensures clarity and pitch accuracy. For F, the fingering often includes the high F key, which helps maintain intonation and tone quality. Alternate fingerings may substitute the high F# key for F, offering a brighter sound. Proper embouchure and air support are crucial for these notes. Players should experiment with these fingerings to find the most responsive and in-tune options for their instrument, as variations exist based on saxophone make and reed strength.

Fingering for G and A

The G and A fingerings in the altissimo register are slightly more complex but essential for a complete upper range. For G, the primary fingering often involves the high F key combined with the first and second fingers of the left hand. This provides stability and pitch accuracy. For A, the fingering typically includes the high F# key, which helps maintain clarity and intonation. Some players prefer using the altissimo A key for a brighter sound. Alternate fingerings may involve subtle adjustments, such as adding the G# key for A to enhance resonance; Experimentation is key, as different saxophones respond differently. Proper reed strength and embouchure are critical for consistent tone in these higher notes. These fingerings are foundational for mastering fast passages and complex melodies in the altissimo range.

Fingering for B and C

The B and C fingerings in the altissimo register are among the most challenging but rewarding. For B, the primary fingering often involves the high F key combined with the left-hand index finger and the right-hand pinky. This setup ensures clarity and pitch accuracy. For C, the fingering typically includes the high F# key and the left-hand middle finger, which helps maintain a bright and focused tone. Alternate fingerings for C may involve using the altissimo key, which can produce a more intense sound. These fingerings require precise embouchure and reed strength to avoid pitch discrepancies. Experimentation is crucial, as saxophone models vary, and some fingerings may need adjustment for optimal performance. Mastering these fingerings opens up advanced musical possibilities in the upper range.

Advanced Fingerings and Alternatives

Advanced fingerings provide alternate options for fast passages and split tones, while others modify tone and pitch at extreme dynamics, enhancing musical expression and technical versatility.

Alternate Fingerings for Fast Passages

Alternate fingerings are essential for navigating fast passages in the altissimo register. These fingerings often prioritize ease of playability and dexterity over tone stability, allowing for smoother transitions between high notes. Some fingerings are specifically designed to reduce finger movement, making intricate passages more accessible. For example, certain alternate fingerings for notes like G and A can facilitate quicker shifts while maintaining pitch accuracy. Additionally, these fingerings can help manage air pressure and embouchure adjustments, which are critical at high velocities. While some alternate fingerings may slightly compromise tone quality, they are invaluable in demanding musical contexts. Experimenting with these fingerings is crucial to finding the best fit for both the passage and the player’s technique.

Split-Tone Fingerings

Split-tone fingerings are specialized fingerings designed to produce a unique, edgy sound by creating a split or double tone. These fingerings are particularly useful for advanced techniques and specific musical effects. They often involve slightly altering the standard fingerings to create a disruption in the tone, resulting in a split or growling sound. Some fingerings are naturally more prone to producing split tones, while others require precise adjustments in embouchure and air pressure. These fingerings are noted in many alto saxophone altissimo finger charts as they provide feedback for players looking to explore tonal variations. Experimenting with split-tone fingerings can enhance a player’s ability to achieve desired tonal effects in the high register.

Dynamic and Pitch Modifications

Dynamic and pitch modifications in the altissimo register allow saxophonists to tailor their sound to specific musical demands. Certain fingerings enable subtle adjustments in tone, color, and pitch, even at extreme dynamic levels. For instance, alternate fingerings can brighten or darken the tone, while others facilitate precise pitch control. These modifications are especially useful for achieving the desired musical effect in fast passages or for adding expressive nuances. Many alto saxophone altissimo finger charts include such fingerings, providing players with tools to enhance their technical and artistic expression. By exploring these options, saxophonists can expand their tonal palette and master the high register with greater versatility and precision.

Resources for Altissimo Finger Charts

Free alto saxophone altissimo finger chart PDFs are widely available online, offering detailed fingerings for high notes. Websites like Jazzwise and Ward Baxter provide comprehensive charts, while Scott Paddock’s Sax School includes exercises for practice. These resources help players master the altissimo range efficiently.

Free PDF Downloads

Several websites offer free PDF downloads for alto saxophone altissimo finger charts, providing detailed fingerings for high notes. Jazzwise and Ward Baxter provide comprehensive charts, while Scott Paddock’s Sax School includes exercises. These resources cover standard and alternate fingerings, allowing players to compare options. Many PDFs also include split-tone fingerings and tips for mastering the altissimo range. Websites like GetYourSaxTogether and BetterSax offer free downloads tailored for alto sax, ensuring access to high-quality materials. These charts are essential for saxophonists aiming to improve their technique and expand their musical capabilities. Downloading these PDFs is a great way to start practicing altissimo notes effectively.

Recommended Online Resources

For mastering the alto saxophone altissimo register, several online resources provide exceptional guidance. Websites like Jazzwise and Ward Baxter offer detailed altissimo finger charts and exercises. Scott Paddock’s Sax School is another excellent resource, featuring video tutorials and PDF downloads. Additionally, GetYourSaxTogether and BetterSax provide comprehensive materials, including fingerings and warm-up routines. These platforms cater to both beginners and advanced players, ensuring a smooth learning curve. Many of these resources are free or low-cost, making them accessible to saxophonists worldwide. By utilizing these online tools, players can refine their technique and achieve mastery of the altissimo range with ease and confidence.

Expert Recommendations

Experts like Matt Olson and Christopher Barrick emphasize the importance of tailored fingerings for the alto saxophone altissimo register. They suggest experimenting with different fingerings to find what works best for your instrument and reed strength. Jay Metcalf recommends starting with basic fingerings and gradually exploring alternatives for fast passages and tone modification. Many experts provide free PDF downloads of their preferred fingerings, such as those from Jazzwise and Ward Baxter. These resources often include exercises and tips for mastering high notes. By following expert guidance, saxophonists can develop a strong, consistent altissimo technique and expand their musical possibilities. These recommendations are invaluable for players seeking to refine their skills and achieve professional-level performance.

Practicing Altissimo Techniques

Consistent practice is essential for mastering the altissimo register. Start with warm-ups and long tones to build control. Use specific exercises from PDF charts to target high notes and improve tone consistency. Regular practice ensures progress and confidence in playing the upper range effectively.

Warm-Up Exercises

Effective warm-up exercises are crucial for developing the altissimo register. Begin with long tones to establish a consistent tone and pitch accuracy. Incorporate lip slurs and scales to build flexibility and strength. Use exercises from alto saxophone altissimo finger charts to target high notes gradually. Start with middle-range notes and ascend to the upper register, ensuring smooth transitions. Practice chromatic scales and arpeggios to improve finger dexterity and coordination. Additionally, focus on breath control and embouchure relaxation to maintain clarity in the high range. Regular practice of these exercises will enhance your ability to play altissimo notes with precision and confidence.

Specific Exercises for Altissimo

Mastering the altissimo register requires targeted exercises. Begin with long tones to develop pitch accuracy and tone consistency. Practice lip slurs and scales in the upper range to improve finger dexterity and embouchure control. Use chromatic scales and arpeggios to build technical proficiency. Incorporate exercises from alto saxophone altissimo finger charts, focusing on notes like E, F, G, and A. Start with slower tempos and gradually increase speed as comfort grows. Alternate between basic and alternate fingerings to enhance versatility. Additionally, practice trills and split-tones to refine articulation and tone quality. Regularly reviewing these exercises will strengthen your command of the altissimo range and expand your musical expression.

Improving Tone and Control

Mastering the altissimo register demands precise tone and control. Start by developing a consistent embouchure and breath support, as these are foundational for producing clear high notes. Practice long tones in the altissimo range to refine pitch accuracy and tone quality. Use scales and arpeggios to improve finger dexterity and coordination. Experiment with dynamic variations to enhance control over soft and loud playing. Incorporate exercises from alto saxophone altissimo finger charts to explore fingerings that suit your reed strength and saxophone setup. Regularly record your practice to identify areas for improvement. Over time, these exercises will help you achieve a rich, resonant tone and precise control in the upper register.

Tips for Mastering the Altissimo Register

Experiment with fingerings to find what works best for your saxophone and reed strength. Focus on developing a consistent embouchure and breath support for stable high notes. Regular practice of long tones and scales will improve tone and control. Use alto saxophone altissimo finger charts as a guide to explore alternate fingerings and enhance technical precision. Record your sessions to track progress and refine your technique. Patience and dedication are key to mastering this challenging yet rewarding range.

Experimentation with Fingerings

Experimenting with fingerings is crucial for mastering the altissimo register. Since saxophones vary in make and model, no single fingering works universally. Players must test different combinations to find what produces the best tone and pitch accuracy. Reed strength also plays a significant role, as softer reeds may require different fingerings than harder ones. Additionally, some fingerings are more effective in specific musical contexts, such as fast passages or split-tone techniques. By exploring alternate fingerings, saxophonists can develop a personalized approach that suits their instrument and playing style. This process of trial and error, guided by resources like alto saxophone altissimo finger charts, helps refine technique and expand musical possibilities.

Importance of Reed Strength

Reed strength significantly impacts the performance of altissimo notes on the alto saxophone. A reed that is too soft may produce unstable high notes, while a harder reed can improve pitch accuracy and tone consistency. The altissimo register demands a balance between brightness and control, which is heavily influenced by reed strength. Players often experiment with different reed strengths to find the optimal match for their mouthpiece and saxophone setup. Many altissimo finger charts suggest specific reed strengths for achieving the best results, especially for advanced techniques like split tones and dynamic modifications. Proper reed selection enhances the overall playability and sound quality in the upper range, making it a critical factor in mastering the altissimo register.

Equipment Considerations

Equipment plays a crucial role in mastering the altissimo register on the alto saxophone. The mouthpiece, neck, and pad setup significantly affect the ease of playing high notes. A well-maintained saxophone with proper pad sealing ensures better airflow and pitch accuracy. The choice of mouthpiece and reed strength must align with the player’s embouchure and breath control. Additionally, the material and make of the saxophone can influence the responsiveness of altissimo fingerings. While no single setup works universally, experimenting with different equipment configurations can help players find their optimal sound and control. Using a reliable altissimo finger chart can also aid in testing various equipment setups to achieve the desired tone and precision in the upper range.

Byakeem

reading is magic book week ideas pdf

Reading Is Magic Book Week 2025 celebrates the transformative power of books, inviting kids, teachers, and parents to embark on a literary adventure.
With its captivating theme, this event fosters creativity, imagination, and a lifelong love for reading through engaging activities, costumes, and shared storytelling experiences.

1.1 Understanding the Theme: Reading Is Magic

The theme “Reading Is Magic” encapsulates the enchanting power of books to transport us to new worlds, ignite imagination, and inspire creativity.
It highlights how reading can transform lives, fostering empathy, knowledge, and personal growth.
By embracing this theme, Book Week 2025 encourages everyone to explore the magical journey of reading, where stories become gateways to adventure, learning, and self-discovery;
This theme is designed to captivate all age groups, reminding us that reading is not just an activity but a timeless, magical experience that unites people across generations.

1.2 The Importance of Book Week in Promoting Literacy

Book Week plays a vital role in promoting literacy by fostering a love for reading among students, teachers, and families.
It creates an engaging environment where stories come alive through costumes, activities, and shared experiences.
By celebrating books, Book Week encourages reading for pleasure, improves literacy skills, and inspires creativity.
Such events help bridge the gap between education and entertainment, making learning fun and accessible for all.
Ultimately, Book Week serves as a powerful tool to nurture lifelong readers and thinkers, shaping a brighter future through the magic of books.

1.3 How to Get Involved in Book Week 2025

Getting involved in Book Week 2025 is an exciting way to celebrate the joy of reading.
Participants can start by exploring the theme, “Reading is Magic,” and planning activities that bring stories to life.
Teachers and parents can organize book-themed events, such as reading marathons, character dress-up days, and literary crafts.
Students can participate in reading challenges, create book-inspired art, and share their favorite stories.
Additionally, communities can collaborate with local libraries and authors to host engaging workshops and discussions.
Everyone is encouraged to embrace the magic of books and make this Book Week unforgettable.

Creative Costume Ideas for Book Week

Bring stories to life with magical costumes inspired by beloved book characters.
From fairy tale heroes to modern superheroes, there’s a character for everyone to embody, sparking imagination and fun.

2.1 Magical Character Costumes for Kids

Kids can transform into their favorite magical characters, from fairy tale heroes to wizards, bringing stories to life.
With DIY costumes like Harry Potter, Alice in Wonderland, or mythical creatures, children can express their creativity and imagination.
These outfits inspire a deeper connection to the books they love, making reading even more enchanting and fun. Parents and teachers can craft these looks together, fostering bonding and excitement for Book Week celebrations.

2.2 DIY Costume Ideas for Teachers and Parents

Teachers and parents can join the magic with simple DIY costumes inspired by beloved book characters.
Classic looks like Hermione Granger or Sherlock Holmes are easy to create with items like scarves, hats, and glasses.
For a whimsical touch, consider dressing up as fictional authors or mythical creatures using cardboard, paint, and fabric.
These costumes not only add fun to the celebration but also inspire students by showing adults’ passion for reading and creativity.
DIY outfits make participation accessible and memorable for everyone involved in Book Week.

2.3 Group Costume Themes Inspired by Popular Books

Group costume themes offer a fun way to celebrate Book Week, fostering collaboration and creativity.
Popular choices include characters from Harry Potter, The Wizard of Oz, or The Jungle Book.
Participants can dress up as their favorite book characters, creating a cohesive and visually striking group look.
Props like wands, hats, or themed accessories can enhance the costumes.
These group themes encourage teamwork, making the celebration more engaging and memorable for everyone involved.
They also highlight the magical and adventurous spirit of reading.

Classroom Activities to Celebrate Reading

Engaging classroom activities, such as reading challenges, book-themed crafts, and author studies, foster creativity and a love for reading, making it a fun and enriching experience.

3.1 Reading Challenges and Competitions

Organize class-wide reading races or individual reading logs to track progress. Introduce competitive and fun challenges, such as “Read Around the World” or “Genre Exploration.” Offer incentives like badges or certificates for milestones achieved. Group competitions, like relay readings or trivia quizzes based on popular books, can foster teamwork and excitement. These activities not only encourage students to read more but also make the experience enjoyable and rewarding, fostering a lifelong love for reading in a magical way.

3.2 Book-Themed Crafts and Art Projects

Transform stories into art with creative book-themed crafts! Students can design custom bookmarks, decorate book covers, or create character-inspired sculptures. Encourage them to illustrate their favorite scenes or make collages from book quotes. DIY projects like paper bag puppets or book page mosaics spark imagination. These hands-on activities allow students to express their love for reading while developing fine motor skills and creativity. Displaying their artwork in the classroom or school library celebrates their connection to the stories they’ve read, making the magic of books come alive in a visual way.

3.3 Author Studies: Exploring Beloved Writers

Dive into the lives and works of cherished authors during Book Week. Conduct in-depth studies of renowned writers, analyzing their writing styles, inspirations, and contributions to literature. Students can create timelines of authors’ lives, write essays about their favorite books, or host discussions about recurring themes. This fosters a deeper appreciation for storytelling and the creative process. By exploring authors like J.K. Rowling, Dr. Seuss, or Roald Dahl, students gain insights into the minds behind their favorite stories, enriching their reading experiences and nurturing a lifelong love for literature.

Engaging Book Week Crafts and Projects

Engaging Book Week crafts and projects inspire creativity and love for reading. Activities like bookmark making, book cover designing, and diorama creation enhance the celebration, making it interactive and fun.

4.1 Making Bookmarks and Book Covers

Creating bookmarks and designing book covers are delightful activities that spark creativity. Use colorful materials like cardstock, stickers, and stamps to craft personalized bookmarks. For book covers, decoupage, fabric, or paint can transform plain covers into magical designs. Students can decorate bookmarks with their favorite characters or motivational quotes. These crafts not only foster creativity but also encourage students to treasure their books. They make thoughtful gifts or keepsakes, promoting a deeper connection to reading. Such hands-on projects are ideal for all ages, making Book Week a memorable celebration of literacy and imagination.

4.2 Creating Book-Inspired Dioramas

Book-inspired dioramas bring stories to life in a three-dimensional format. Students can use shoe boxes or cardboard to create scenes from their favorite books. Decorate the inside with painted backgrounds, miniature characters, and small props. Encourage creativity by adding details like furniture, landscapes, or symbolic objects from the story. This activity helps students visualize narratives and connect deeply with the plot and characters. Displaying dioramas in classrooms or libraries fosters a sense of pride and sparks conversations about literature. It’s a fun, interactive way to celebrate the magic of reading and storytelling.

4.3 Designing Magical Book Week Posters

Designing magical Book Week posters is a fun way to celebrate the theme “Reading Is Magic.” Encourage students to use vibrant colors, creative imagery, and catchy slogans. Incorporate iconic book characters, magical landscapes, or symbolic elements like wands, stars, or open books. Use markers, glitter, or digital tools to make the posters eye-catching. Display them in classrooms, libraries, or hallways to create a festive atmosphere. This activity fosters creativity and excitement, inspiring others to explore the enchanting world of books and reading.

Storytelling and Performance Ideas

Storytelling and performance ideas bring books to life, fostering imagination and engagement. Students can act out favorite scenes, create puppet shows, or host interactive readings.

5.1 Hosting a Storytelling Session

Hosting a storytelling session is a delightful way to captivate students during Book Week. Create a magical atmosphere with dim lighting, cozy seating, and themed props. Encourage students to share their favorite stories or create new ones inspired by beloved books. Teachers can model expressive storytelling techniques, such as voice modulation and gestures. Invite students to participate by acting out scenes or contributing to group stories. This interactive approach fosters creativity, public speaking skills, and a deeper love for storytelling. It also allows students to connect with characters and narratives on a personal level, making reading even more enchanting.

5.2 Dramatic Readings of Favorite Books

Dramatic readings bring stories to life, engaging students and fostering a deeper connection with literature. Choose popular books or excerpts that resonate with your audience. Encourage students to take turns reading aloud, using expressive voices and gestures to convey emotions. Assign roles for character dialogue to make it interactive. Teachers can model fluent reading techniques, while students practice public speaking and comprehension. Add sound effects or background music to enhance the experience. This activity not only boosts confidence but also makes reading a shared, magical experience for everyone involved.

5.3 Puppet Shows Based on Book Characters

Puppet shows are a delightful way to bring book characters to life during Reading Is Magic Book Week. Students can create their own puppets using materials like socks, paper bags, or cardboard. These puppets can represent beloved characters from popular books. Performances can retell favorite stories or create new adventures, fostering creativity and storytelling skills. Assign roles like puppeteers, narrators, or sound effect managers to engage everyone. This interactive activity not only entertains but also enhances comprehension and enthusiasm for reading, making it a magical experience for all participants.

Book Week Event Planning

Organizing Book Week events requires creativity and coordination. Collaborate with teachers, students, and the community to ensure a memorable celebration that fosters a love for reading.

6.1 Organizing a Book Fair or Marketplace

Organizing a book fair or marketplace is a fantastic way to celebrate “Reading Is Magic” Book Week. Start by selecting a venue and setting dates. Coordinate with local publishers, authors, and schools to showcase a variety of books. Create themed sections, such as Magic Genre Alley or Spellbinding Stories Corner, to captivate visitors. Include interactive activities like author meet-and-greets, reading sessions, and book signings. Promote the event through posters, social media, and school newsletters. Encourage community participation by inviting book clubs and literacy organizations. Make it a magical experience with decorations, music, and a festive atmosphere that celebrates the joy of reading!

6.2 Planning a Book Week Assembly

Planning a Book Week assembly is a key event to celebrate “Reading Is Magic.” Start by setting a theme and date, ensuring all students and staff are involved. Invite guest speakers, such as authors or illustrators, to inspire the audience. Organize performances like skits, poetry readings, or book-themed songs. Encourage students to share their favorite books or characters. Promote the event with posters and announcements. Make it interactive with quizzes or trivia related to popular books. Ensure the assembly is engaging, fun, and reflects the magic of reading, fostering a love for literature in everyone.

6.3 Coordinating a Reading Marathon

Coordinating a Reading Marathon is an exciting way to celebrate “Reading Is Magic.” Choose a date and duration that suits your audience, such as a full school day or weekend. Select a variety of books, including popular and magical themes, to cater to different age groups. Create a cozy reading environment with themed decorations. Encourage participation by offering breaks with snacks and activities like book trivia or themed games. Provide incentives, such as certificates or prizes, for those who read the most or complete a challenge. Promote the event through posters, social media, and announcements to maximize involvement and enthusiasm.

Technology Integration in Book Week

Integrate technology into Book Week with digital book clubs, interactive reading challenges, and online author Q&A sessions. Use educational apps and multimedia tools to enhance engagement and learning.

7.1 Using Digital Tools for Book Reviews

Digital tools can transform book reviews into engaging and interactive experiences. Students can use platforms like Google Docs or Padlet to share their thoughts and collaborate on group reviews. Interactive presentation tools such as Prezi or Canva allow for visually appealing summaries. Additionally, digital whiteboards like SMART Boards enable real-time discussions and feedback. Encourage the use of audiobooks and e-readers, which often feature built-in highlight and note-taking options. These tools not only enhance participation but also make the review process more accessible and fun for all ages, fostering a deeper connection to the stories they explore during Book Week.

7.2 Creating Book Trailers and Videos

Book trailers and videos are dynamic ways to engage students during Book Week. Using tools like BookCreator, iMovie, or Canva, students can craft compelling trailers that highlight key scenes, characters, and themes. They can collaborate in groups to script, film, and edit their projects. These creations can be shared on school websites, social media, or during assemblies. This activity not only fosters creativity but also enhances digital literacy. It encourages students to think critically about stories and share their interpretations with the community, making reading a fun and interactive experience for everyone involved.

7.3 Online Book Discussions and Forums

Online book discussions and forums offer a modern way to engage students and communities in Book Week. Platforms like Google Classroom, Edmodo, or dedicated forum sites can host discussions. Teachers can create themed discussion threads, such as “Magical Worlds in Literature” or “Favorite Book Characters.” Students, parents, and educators can share insights, ask questions, and participate in polls. These forums foster a sense of connection and deepen understanding of books. They also provide a space for shy students to voice their opinions, making reading a shared and inclusive experience for everyone involved.

Involving the Community

Involving the community in Reading Is Magic Book Week fosters connections and shared excitement for literacy. Local businesses, libraries, and organizations can collaborate to create engaging events and activities.

8.1 Partnering with Local Libraries

Collaborating with local libraries for Reading Is Magic Book Week can enhance the celebration by leveraging their resources and expertise. Libraries often have extensive book collections, experienced staff, and event spaces that can host author visits, storytelling sessions, or book-themed workshops. Partnering with libraries allows schools to access a wider range of books and organize joint events, such as reading challenges or book fairs. This collaboration also fosters a sense of community and promotes literacy beyond the classroom. Libraries can further support by providing book recommendations, hosting reading marathons, or offering craft activities tied to popular children’s literature.

8.2 Inviting Guest Authors or Illustrators

Inviting guest authors or illustrators to participate in Reading Is Magic Book Week can inspire students and deepen their connection to literature. These visits provide unique opportunities for children to meet creators of their favorite books, gain insights into the writing process, and learn about the craft of storytelling. Authors and illustrators can conduct workshops, share their creative journeys, and engage students in interactive sessions. Such events not only spark imagination but also motivate students to explore writing and art, fostering a lifelong love for reading and creativity. This enriches the educational experience and makes Book Week memorable.

8.3 Hosting a Family Reading Night

Hosting a Family Reading Night is a wonderful way to foster a love for reading and strengthen family bonds. Create a cozy atmosphere with dim lights, comfy seating, and themed decorations. Families can share favorite books, participate in reading challenges, or enjoy storytelling sessions. Offer refreshments and activities like book-themed crafts or trivia games. This event encourages families to prioritize reading together, creating lasting memories. It also provides an opportunity for parents to model reading habits and inspire their children to explore the magic of books. Make it engaging and fun for all ages!

Book Week Ideas for Different Age Groups

Book Week can be tailored to different age groups, ensuring all participants enjoy engaging activities. Younger students can explore picture books, while teenagers delve into complex themes. Adults can join discussions or reading challenges, fostering a community-wide celebration of reading.

9.1 Activities for Younger Students

For younger students, Book Week can be a magical experience with age-appropriate activities. Storytime sessions featuring popular children’s books, such as Where the Wild Things Are or The Gruffalo, can spark imagination. Craft workshops allow kids to create bookmarks, book covers, or character masks. Reading scavenger hunts and rhyme games make learning fun. Interactive storytelling with puppets or costumes encourages participation. These activities help build a lifelong love for reading in a playful and engaging way.

9.2 Engaging Teenagers with Book Week

Engaging teenagers during Book Week requires activities that resonate with their interests. Book clubs focused on popular young adult novels can foster discussions. Creative writing contests with magical themes encourage self-expression. Hosting author Q&A sessions via video calls or live events can inspire teens. Incorporating graphic novels and comic book workshops taps into their visual storytelling preferences. Debates on literary characters or modern issues in literature can spark critical thinking. These activities ensure teens feel connected and valued during the celebration.

9.3 Involving Adults in the Celebration

Involving adults in Book Week fosters a sense of community and shared joy in reading. Encourage adult book clubs to participate in discussions or host author talks featuring guest speakers. Organize reading challenges or literary trivia nights tailored for adults. Invite parents and educators to volunteer for events or share their favorite books with students. This not only strengthens connections but also highlights the magic of reading across generations, making the celebration inclusive and impactful for everyone involved.

Assessing the Impact of Book Week

Evaluate the success of Book Week by measuring participation rates and student engagement. Use surveys and feedback forms to identify strengths and areas for improvement, ensuring future events are even more impactful.

10.1 Measuring Student Engagement

To measure student engagement during Book Week, track participation rates in activities like reading challenges and crafts. Use observation checklists to assess enthusiasm and involvement. Distribute feedback forms to gather insights on favorite activities and perceived benefits. Monitor reading logs to see if students explored new genres or authors. Analyze creative outputs, such as posters or dioramas, to gauge understanding and interest. Finally, conduct informal discussions to capture students’ overall enjoyment and how the event sparked their love for reading. This data helps refine future Book Week celebrations.

10.2 Gathering Feedback from Participants

Gathering feedback from participants is crucial for understanding the success of Book Week. Use surveys or questionnaires to collect insights from students, teachers, and parents. Include both open-ended questions and multiple-choice options to capture diverse perspectives. Conduct focus groups to delve deeper into experiences and suggestions. Encourage anonymous submissions to ensure honesty. Analyze the feedback to identify strengths, areas for improvement, and popular activities. This data is invaluable for refining future events and ensuring they align with participants’ interests and expectations. Feedback helps create a more engaging and impactful Book Week celebration.

10.3 Planning for Future Book Week Celebrations

Effective planning is key to ensuring successful future Book Week celebrations. Start by setting clear objectives aligned with literacy goals and community engagement. Engage stakeholders early to foster collaboration and diverse perspectives. Develop a detailed timeline and budget, allocating resources wisely. Incorporate innovative themes and activities to maintain excitement. Utilize feedback from previous events to refine plans and address past challenges. Establish a robust marketing strategy to promote the event widely. Finally, prepare contingency plans to adapt to any unforeseen circumstances, ensuring a seamless and impactful celebration.

Byakeem

contender 65 manual

Welcome to the Contender 65 manual, your guide to understanding and using the Graco Contender 65 convertible car seat․ This manual provides essential information for safe installation, usage, and maintenance, ensuring your child’s protection and comfort on every journey․

Designed for infants (5-40 lbs rear-facing) and toddlers (20-65 lbs forward-facing), the Contender 65 offers a Simply Safe Adjust Harness System for easy, no-rethread adjustments, ensuring a secure and customizable fit․

Overview of the Contender 65 Car Seat

The Graco Contender 65 is a versatile and reliable convertible car seat designed for children from 5 to 65 pounds․ It accommodates rear-facing infants (5-40 lbs) and forward-facing toddlers (20-65 lbs), ensuring long-term use․ The seat features a lightweight design and compact footprint, making it ideal for smaller vehicles or families needing easy transfers between cars․

Equipped with the Simply Safe Adjust Harness System, it offers a one-hand, no-rethread harness for effortless adjustments․ The Contender 65 also provides a secure installation using either seatbelt or LATCH․ Its durable materials and comfortable padding ensure safety and convenience, while adjustable recline positions enhance your child’s comfort during trips․ This car seat is a practical choice for growing families, blending safety, ease of use, and affordability․

Importance of Reading the Manual

Reading the Contender 65 manual is crucial for ensuring your child’s safety and proper use of the car seat․ The manual provides detailed instructions for installation, adjustment, and maintenance, helping you navigate its features effectively․ Understanding weight and height limits, proper harness tightening, and installation methods (seatbelt or LATCH) is essential for maximizing safety․ The manual also covers troubleshooting common issues and maintenance tips, ensuring longevity and reliability․ By following the guidelines, you can ensure your child is protected in various driving conditions․ Always refer to the manual before making adjustments or addressing concerns to guarantee correct usage and compliance with safety standards․

Key Features of the Contender 65

The Contender 65 convertible car seat boasts several standout features designed for safety, comfort, and convenience․ Its Simply Safe Adjust Harness System allows for one-hand, no-rethread adjustments, ensuring a secure fit as your child grows․ The seat accommodates rear-facing infants from 5-40 lbs and forward-facing toddlers from 20-65 lbs, providing extended use․ It features a 5-point harness for enhanced safety and can be installed using either a seatbelt or LATCH connectors․ The car seat’s compact design, with an outside width of 20․75 inches, makes it a great fit for smaller vehicles․ Additionally, it includes a dishwasher-safe cushion for easy maintenance and is compatible with accessories like canopies and cup holders, enhancing both functionality and comfort for your child․

Installation Guidelines

The Contender 65 offers versatile installation options, including rear-facing for infants (5-40 lbs) and forward-facing for toddlers (20-65 lbs)․ Use a seatbelt or LATCH connectors for secure placement, ensuring proper tightening to achieve a snug, level fit․ Follow detailed steps in the manual for safe and correct installation․

Rear-Facing Installation Steps

For rear-facing installation, ensure the car seat is placed in the back seat of your vehicle․ Locate the seatbelt or LATCH connectors, depending on your preference․ Route the seatbelt through the designated path on the car seat base, ensuring it is flat and not twisted․ Secure the base by tightening the seatbelt until the car seat is snug and level․ Use the tether strap to anchor the top of the seat for added stability․ Check the level indicator to confirm the seat is properly aligned․ Finally, test the installation by gently rocking the seat—it should not move more than one inch side to side or front to back․ Always refer to the manual for detailed guidance and ensure all safety precautions are met for your child’s protection;

Forward-Facing Installation Steps

For forward-facing installation, ensure your child meets the minimum weight requirement of 22 pounds and is at least two years old․ Place the car seat in the vehicle’s back seat, facing forward․ Attach the tether hook to a designated anchor point in your vehicle to prevent excessive movement․ Route the seatbelt or LATCH connectors through the forward-facing belt path on the car seat base․ Secure the base by tightening the seatbelt or LATCH straps until the car seat is snug and level․ Use the level indicator to confirm proper alignment․ Tighten the harness around your child, ensuring it is snug and the chest clip is at armpit level․ Always test the installation by gently rocking the seat to ensure it does not move more than one inch in any direction․ Consult the manual for additional guidance and safety tips․

Using the Seatbelt for Installation

To install the Contender 65 using a seatbelt, begin by locating the seatbelt path on the car seat base․ Route the vehicle’s seatbelt through this designated path, ensuring it is flat and not twisted․ Buckle the seatbelt and pull the strap to tighten it securely around the base․ Use the tightening mechanism to ensure the car seat is snug against the vehicle seat․ Check the level indicator to confirm the seat is properly aligned․ Attach the tether hook to the vehicle’s tether anchor point to add stability․ Tighten the tether strap firmly to prevent any movement․ Finally, test the installation by rocking the car seat gently; it should not move more than one inch in any direction․ Refer to your vehicle’s manual for specific instructions on seatbelt usage and tether anchor locations․

Using LATCH for Installation

To install the Contender 65 using LATCH (Lower Anchors and Tethers for Children), first locate the LATCH anchors in your vehicle, typically found between the seat cushions․ Attach the car seat’s LATCH connectors to these anchors, ensuring they click securely into place․ Tighten the LATCH straps by pulling them firmly to remove any slack․ Use the built-in tensioning mechanism to snug the car seat against the vehicle seat․ Check the level indicator to ensure proper alignment․ If the vehicle seat is too far back, move it forward to achieve a stable installation․ Avoid using LATCH if the vehicle seatbelt is more convenient or if the LATCH anchors are not accessible․ Test the installation by gently rocking the car seat side to side and front to back; it should feel secure with minimal movement․

Tightening the Seatbelt or LATCH

Tightening the seatbelt or LATCH system is crucial for securing the Contender 65 car seat․ For seatbelt installation, thread the belt through the designated path on the car seat and buckle it․ Pull the belt firmly to remove slack, ensuring it lies flat and straight․ If your vehicle has a locking mechanism, engage it to prevent the belt from loosening․ For LATCH installation, attach the connectors to the vehicle’s anchors and pull the straps to tighten․ Use the built-in tightening mechanism to ensure the car seat is snug against the vehicle seat․ Check the level indicator to confirm proper alignment; Test the installation by gently rocking the seat; it should feel stable with minimal movement․ Proper tightening ensures your child’s safety, so always verify the seat’s stability before driving․ Avoid over-tightening, as this could damage the car seat or vehicle components․

Safety Features and Specifications

The Contender 65 features a Simply Safe Adjust Harness System, side-impact protection, and durable materials․ It meets federal safety standards and ensures reliable protection for your child․

Weight and Height Limits

The Contender 65 accommodates children with a weight range of 5 to 40 pounds in rear-facing mode and 22 to 65 pounds in forward-facing mode․ The height limit is up to 40 inches for rear-facing and up to 49 inches for forward-facing․ Properly adhering to these limits ensures optimal safety and comfort for your child․ Always verify your child’s measurements against these guidelines before use․ Additionally, consult your vehicle’s manual for any specific size or weight restrictions․ Following these specifications guarantees proper protection and comfort for your child during travel․ This ensures the seat is used correctly and safely, aligning with the manufacturer’s recommendations․ Proper fit is essential for maximizing the seat’s protective features․ Regularly check your child’s growth to ensure they remain within the specified limits․ This ensures continued safety and comfort as your child grows․ Always prioritize these guidelines for optimal results․

Crash Testing and Safety Ratings

The Contender 65 has undergone rigorous crash testing to ensure it meets or exceeds federal safety standards․ It has been tested for front, side, and rear impacts to provide superior protection for your child․ The seat is designed with advanced safety features, such as energy-absorbing foam and a sturdy steel-reinforced frame, to minimize the risk of injury․ The National Highway Traffic Safety Administration (NHTSA) has awarded the Contender 65 a high safety rating, reflecting its exceptional performance in crash scenarios; Additionally, it has passed rigorous side-impact testing, demonstrating its ability to absorb and distribute crash forces effectively․ Parents can trust the Contender 65 to provide reliable protection in the event of a collision․ Regular updates and certifications ensure it remains a top choice for safety-conscious families․ Always verify the latest ratings and certifications for the most current information․

Material Quality and Durability

The Contender 65 is constructed with high-quality materials designed to ensure both safety and longevity․ The seat features a durable steel-reinforced frame that provides structural integrity and stability․ The cushions are made from soft, breathable fabrics that promote comfort while withstanding regular use․ The seat’s cover is removable and washable, making maintenance easy․ Additionally, the harness and buckle are built to last, withstanding repeated adjustments and cleaning․ The materials used meet federal safety standards for flame resistance and durability․ The overall design prioritizes both comfort and resilience, ensuring the seat remains in excellent condition over time․ Parents can trust the Contender 65 to endure the wear and tear of daily use while maintaining its safety and performance capabilities․ Regular cleaning and proper care will extend the lifespan of the seat․ This focus on quality makes it a reliable choice for growing families․

Simply Safe Adjust Harness System

The Simply Safe Adjust Harness System on the Contender 65 is designed to provide a secure and comfortable fit for your child․ This innovative system allows for easy, one-hand adjustments to the harness height, ensuring proper positioning as your child grows․ The system eliminates the need for rethreading the harness, saving time and effort․ It also features a no-rethread harness, which adjusts effortlessly to accommodate your child’s changing size․ The padded harness straps and buckle are designed for comfort, while the secure snug fit ensures your child’s safety in the event of sudden stops or collisions․ This system is a standout feature, combining convenience, ease of use, and enhanced safety for parents and children alike․ It’s a key reason why the Contender 65 is a popular choice among parents seeking reliability and simplicity․ The system’s intuitive design makes it easier to ensure your child is properly secured every time, providing peace of mind for parents․ By streamlining the adjustment process, the Simply Safe Adjust Harness System prioritizes both safety and convenience, making it a practical solution for busy families․ This feature underscores the Contender 65’s commitment to delivering a hassle-free and secure car seat experience․ The system’s ease of use ensures that parents can focus on what matters most—keeping their child safe and comfortable during every journey․ With the Simply Safe Adjust Harness System, you can trust that your child’s car seat is both easy to use and designed with their safety in mind․ The Contender 65’s attention to detail in this feature highlights its dedication to providing a superior product for families․

Usage and Maintenance

Regularly inspect the Contender 65 for wear and tear․ Ensure proper installation and check expiration dates․ Store in a cool, dry place to maintain quality and safety․

Adjusting the Harness System

To ensure your child’s safety, the Contender 65’s harness system must be properly adjusted․ Start by loosening the harness straps and shoulder pads using the harness adjustment strap located at the bottom of the seat․ Place your child in the seat and fasten the harness, ensuring the straps are snug but not too tight․ The Simply Safe Adjust™ Harness System allows for easy adjustments without rethreading․ Pull the straps to tighten them evenly, checking that the harness passes the “pinch test” (you should not be able to pinch any excess fabric)․ Position the chest clip at armpit level and ensure all buckles are secure․ Regularly check the harness fit as your child grows․

Reclining Positions for Comfort

The Contender 65 offers multiple recline positions to ensure your child’s comfort during trips․ To adjust the recline, locate the recline handle at the base of the seat and pull it outward․ This allows you to easily transition between the available positions․ For rear-facing use, the seat can be set to a more upright position as your child grows․ In forward-facing mode, the recline feature enhances comfort during long drives․ Always ensure the seat is firmly secured in the chosen position․ The recline positions are designed to provide optimal support for your child’s head and neck, promoting relaxation and reducing fatigue․ Regularly check the manual for specific guidelines on recline adjustments based on your child’s age and size․

Cleaning the Car Seat

Regular cleaning of the Contender 65 car seat is essential for maintaining hygiene and longevity․ Start by removing any loose debris or toys․ For fabric cleaning, use a mild soap solution and a soft cloth to gently wipe down the surfaces․ Avoid harsh chemicals or abrasive cleaners, as they may damage the materials․ The harness can be cleaned with a damp cloth and mild soap, ensuring no moisture seeps into the straps․ For tough stains, lightly scrub the area and let it air dry․ Do not submerge the seat in water or use bleach, as this can compromise its safety features․ Always refer to the manual for specific cleaning recommendations to ensure the integrity of the seat remains intact․

Storage and Transportation Tips

Proper storage and transportation of the Contender 65 car seat are crucial to maintain its safety and functionality․ When not in use, store the seat in a cool, dry place away from direct sunlight to prevent material degradation․ Avoid storing it in the trunk of a vehicle for extended periods, as extreme temperatures can affect its integrity․ For transportation, ensure the seat is securely fastened in the vehicle using the seatbelt to prevent movement․ When carrying the seat, use the built-in handle for easy mobility․ Never leave the seat unattended in public areas or expose it to harsh weather conditions․ For air travel, check with the airline for specific guidelines and consider using a protective travel bag to prevent damage during transit․

Troubleshooting Common Issues

Common issues with the Contender 65 include harness tightness and installation difficulties․ Ensure proper tightening and consult the manual for guidance․ Adjustments may resolve most problems efficiently․

Resolving Harness Tightness Issues

If the harness feels too tight, start by ensuring the straps are not twisted․ Loosen the harness by pulling the adjuster strap located at the bottom of the seat․ Reposition your child, ensuring their shoulders are aligned with the seat’s harness slots․ Tighten the straps evenly, making sure they lie flat against your child’s chest․ Use the Simply Safe Adjust™ harness system to adjust the height if needed․ Always check the fit by sliding your hand between the harness and your child’s chest—it should feel snug but not restrictive․ If issues persist, refer to the manual or contact customer support for assistance․ Proper harness fit is essential for safety and comfort․

Fixing Installation Difficulties

When encountering installation difficulties with the Contender 65, ensure the base is properly aligned with the vehicle seat․ Verify that the seatbelt or LATCH connectors are securely fastened and not twisted․ Tighten the seatbelt or LATCH strap incrementally, checking the fit after each adjustment․ If using a seatbelt, ensure it is threaded correctly through the designated paths․ For LATCH installation, confirm that the connectors are clicked into place and tightened firmly․ If the base feels unstable, adjust its position slightly and retighten․ Always refer to both your vehicle’s and the Contender 65’s manuals for specific guidance․ If issues persist, contact customer support for further assistance․ Proper installation is crucial for safety and reliability․

Addressing Recline Position Problems

If the Contender 65’s recline position isn’t adjusting properly, start by ensuring the car seat is installed correctly․ Check if the recline lever is accessible and free from obstructions․ Gently rock the seat back and forth while pulling the lever to release any stiffness․ If the seat doesn’t recline, verify that the base is tightly secured to the vehicle seat․ Clean the recline mechanism to remove any debris that might be causing friction․ For stubborn issues, refer to the manual for diagrams or video guides․ Ensure the seatbelt or LATCH is properly tightened, as a loose installation can restrict recline functionality․ Testing the recline after adjustments is essential to confirm it operates smoothly․ If problems persist, consult the troubleshooting section or contact customer support for assistance․

Dealing with Fabric Stains and Odors

The Contender 65’s fabric can be cleaned to remove stains and odors․ For stains, gently spot clean with a mild detergent and cold water, avoiding harsh chemicals or abrasive scrubbers․ Allow the fabric to air dry completely to prevent moisture buildup․ For odors, sprinkle baking soda on the affected area, let it sit, then vacuum․ Do not machine wash or submerge the fabric, as this may damage the seat’s structural integrity․ Regularly inspect and clean the fabric to maintain hygiene․ Always refer to the manual for specific cleaning recommendations․ Avoid using bleach or fabric softeners, as they may weaken the material․ Proper care ensures the fabric remains clean, fresh, and safe for your child․

Accessories and Compatibility

Explore compatible accessories like canopies, cup holders, and support pillows to enhance functionality․ Ensure compatibility with your vehicle for a secure and proper fit․

Compatible Accessories for the Contender 65

The Contender 65 is designed to work seamlessly with a variety of Graco-approved accessories to enhance functionality and comfort․ A canopy provides shade and protection from the elements, while cup holders keep drinks within easy reach․ Additionally, support pillows can be installed to provide extra comfort for younger children․ Ensure all accessories are Graco-compatible to maintain safety and proper fit․ Always check Graco’s compatibility list before purchasing any add-ons․ These accessories can be easily installed and do not compromise the seat’s safety features․ By adding these optional components, you can customize the Contender 65 to meet your child’s needs while ensuring a secure and comfortable ride․

Using Canopy and Cup Holders

The Contender 65’s canopy and cup holders are designed to enhance your child’s comfort and convenience during travel․ The canopy easily attaches to the seat and provides shade, protecting your child from direct sunlight or rain․ Cup holders are conveniently located on the sides of the seat, keeping drinks and snacks within easy reach․ To use the canopy, simply snap it onto the designated hooks․ For the cup holders, ensure they are securely attached and can hold sippy cups, bottles, or small toys․ Regularly clean the canopy and cup holders to maintain hygiene․ Adjust the canopy as needed for optimal coverage, and always ensure it does not obstruct your child’s view․ These features add practicality and comfort to your child’s car seat experience․

Installing Additional Support Pillows

Additional support pillows can be installed in the Contender 65 to provide extra comfort for your child; These pillows are optional and should only be used if they do not interfere with the harness system or the seat’s safety features․ To install, place the pillow along the seat’s back or sides, ensuring it does not push the child forward or affect the harness fit․ Secure the pillow firmly to prevent movement during travel․ Avoid using pillows that are not specifically designed for the Contender 65, as they may compromise safety․ Always refer to the manual for compatibility and proper placement․ After installation, check the harness to ensure it remains snug and even, and adjust as needed for your child’s comfort and safety․

Comparison with Other Models

The Contender 65 stands out for its durability and safety features, offering a higher weight limit and easier adjustments compared to similar models like the Graco Admiral 65․

Contender 65 vs․ Graco Admiral 65

The Contender 65 and Graco Admiral 65 are both popular convertible car seats, but they have distinct differences․ The Contender 65 offers a higher weight limit of 65 pounds in both rear- and forward-facing modes, while the Admiral 65 maxes out at 65 pounds but with slightly less versatility․ The Contender 65 features Graco’s Simply Safe Adjust Harness System, which simplifies adjustments, whereas the Admiral 65 uses a more traditional harness system․ Both seats are LATCH-compatible and have similar safety ratings, but the Contender 65 is often praised for its easier installation process and more comfortable recline positions․ Ultimately, the choice depends on your priorities—whether you value advanced harness adjustments or a more streamlined design․

Contender 65 vs․ Other Convertible Car Seats

The Contender 65 stands out among other convertible car seats due to its exceptional weight and height limits, accommodating children up to 65 pounds and 49 inches tall․ Unlike some competitors, it offers a seamless transition between rear- and forward-facing modes, with a sturdy design that ensures long-lasting durability․ While other seats may have more complex installation processes, the Contender 65 excels with its user-friendly LATCH system and straightforward seatbelt installation․ Additionally, its Simply Safe Adjust Harness System provides effortless adjustments, a feature that surpasses many other models․ Compared to brands like Britax or Evenflo, the Contender 65 balances affordability with premium safety features, making it a top choice for parents seeking reliability and ease of use․

Unique Selling Points of the Contender 65

The Contender 65 boasts several standout features that set it apart from competitors․ Its Simply Safe Adjust Harness System ensures effortless adjustments, while the 10-position recline offers unmatched comfort for growing children․ The seat’s steel-reinforced frame provides exceptional durability and safety․ Additionally, the InRight LATCH system allows for quick and secure installation, reducing the risk of errors․ The seat also accommodates children up to 65 pounds and 49 inches tall, making it a long-lasting solution․ Machine-washable fabrics and easy-to-remove covers add practicality․ With its affordable price point and premium features, the Contender 65 delivers excellent value․ Its combination of safety, comfort, and ease of use makes it a top choice for parents seeking a reliable convertible car seat․

The Contender 65 manual provides comprehensive guidance for safe and effective car seat use․ Its clear instructions ensure optimal installation, maintenance, and adjustment for your child’s safety and comfort․

Final Thoughts on the Contender 65

The Contender 65 car seat manual is a comprehensive guide designed to ensure safety, comfort, and ease of use․ With clear installation steps, safety features, and maintenance tips, it equips parents to provide optimal protection for their children․ The manual emphasizes proper usage, from harness adjustments to recline positions, ensuring a secure fit․ Its focus on durability and easy cleaning adds to its practicality․ By following the guidelines, parents can trust the Contender 65 to deliver reliable performance․ This car seat stands out for its balance of safety, convenience, and longevity, making it a valuable choice for families seeking a dependable option for their growing child․

Recommendations for Potential Buyers

If you’re considering the Contender 65, it’s essential to prioritize your child’s safety and comfort․ This car seat is ideal for families seeking a reliable, durable option that grows with their child․ Before purchasing, ensure it fits your vehicle and meets your child’s weight and height requirements․ Always check the expiration date and verify compatibility with your car’s seating configuration․ For optimal use, read the manual thoroughly to understand installation and maintenance best practices․ Consider additional accessories like cup holders or support pillows for enhanced convenience․ Ultimately, the Contender 65 is a practical choice for parents seeking a safe, long-lasting car seat․

Byakeem

efferdent instructions

Discover how to effectively clean and maintain your dentures with Efferdent․ This guide provides essential steps and tips for proper use, ensuring optimal hygiene and longevity of your dentures․

1․1 What is Efferdent?

Efferdent is a popular denture cleaning tablet designed to effectively remove plaque, food particles, and stains from dentures․ It is specifically formulated to clean and maintain denture hygiene, ensuring a fresh and clean smile․ The tablets contain active ingredients like sodium bicarbonate, which help break down tough stains and odors․ Efferdent is widely used by denture wearers due to its ease of use and effectiveness․ It is suitable for most types of dentures, including full and partial dentures, and is often recommended by dentists and dental hygienists․ By following the instructions, users can achieve a deeper clean and maintain the longevity of their dentures․ Efferdent is a trusted solution for keeping dentures clean, fresh, and in great condition․

1․2 Importance of Following Instructions

Following Efferdent instructions is crucial for achieving optimal cleaning results and maintaining the health of your dentures․ Proper use ensures the removal of plaque, bacteria, and stains, preventing bad odors and infections․ Incorrect usage, such as using too many tablets or soaking for the wrong duration, can damage your dentures or leave harmful residues․ Adhering to the guidelines helps preserve the longevity and appearance of your dentures․ It also ensures your safety, as misuse can lead to irritation or other issues․ By following the instructions carefully, you can enjoy a clean, fresh smile and maintain good oral hygiene․ Consistency and attention to detail are key to getting the most out of Efferdent and keeping your dentures in excellent condition․

Safety Precautions

Always handle Efferdent with care․ Avoid ingesting the tablets or solution, and keep them away from children and pets․ Wear gloves if sensitive, and rinse hands thoroughly after use․

2․1 General Safety Guidelines

When using Efferdent, prioritize safety to ensure effective and risk-free cleaning of your dentures․ Always handle the tablets with dry hands to prevent them from dissolving prematurely․ Avoid ingesting the tablets or the cleaning solution, as they are not meant for consumption․ Keep Efferdent out of reach of children and pets to prevent accidental ingestion․ If you have sensitive skin, consider wearing gloves during the cleaning process․ After handling the tablets or solution, rinse your hands thoroughly with water․ Never use Efferdent for purposes other than cleaning dentures․ Adhere to the recommended dosage and soaking times to maintain safety and effectiveness․ By following these guidelines, you can ensure a safe and successful cleaning experience․

2․2 Special Considerations for Sensitive Individuals

If you have sensitive skin or certain medical conditions, take extra precautions when using Efferdent․ Wear gloves during handling to avoid skin irritation․ Perform a patch test on a small area of your hand before using the product extensively․ Avoid getting the solution in your eyes or mouth, as it may cause discomfort․ Individuals with open sores or gum sensitivity should consult their dentist before use․ If you experience any allergic reactions, discontinue use and seek medical advice․ For those with respiratory issues, avoid inhaling the powder or fumes․ Always rinse your dentures thoroughly after cleaning to remove any residual solution․ By following these guidelines, sensitive individuals can safely and effectively use Efferdent for their denture care needs․

Preparation Steps

Before cleaning, gather all necessary materials and ensure your dentures are free from loose food particles․ This step ensures a smooth and effective cleaning process․

3․1 Gathering Necessary Materials

To start, gather Efferdent tablets, a clean container, and warm water․ You may also need gloves to protect sensitive skin and a soft-bristle brush for scrubbing․ Ensure all items are within reach for a smooth process․ A clean, large enough container is essential to fully submerge your dentures․ Optional items include a denture brush for stubborn stains and a towel for drying․ Having everything prepared beforehand helps avoid interruptions and ensures effective cleaning․ Always use fresh water and avoid using household containers that may harbor bacteria․ This step sets the foundation for a successful cleaning routine․

3․2 Preparing Your Dentures

Before cleaning, rinse your dentures under warm running water to remove loose food particles and debris․ Gently scrub the surface with a soft-bristle toothbrush to eliminate any stubborn residue․ If your dentures use adhesives, remove them completely to ensure proper cleaning․ Check for any broken or loose parts, as these may require professional adjustment before soaking․ Handle your dentures with care to avoid scratching the surface․ Pat them dry with a soft cloth to remove excess moisture, ensuring they are ready for the cleaning solution․ Proper preparation ensures the Efferdent cleaning process is effective and prevents damage to your dentures․

Cleaning Process

Follow these steps for a thorough cleaning: dissolve Efferdent tablets in water, soak your dentures, brush gently, and rinse thoroughly for a clean, fresh result every time․

4․1 Dissolving Efferdent Tablets

Dissolving Efferdent tablets is the first step in the cleaning process․ Fill a bowl or sink with enough warm water to fully submerge your dentures․ Drop one Efferdent tablet into the water for every 32 ounces (approximately 1 liter) of water․ Allow the tablet to dissolve completely, which should take about 1-2 minutes․ Ensure the water is not too hot, as extreme temperatures can damage certain denture materials․ Avoid using more tablets than recommended, as this can create a overly concentrated solution that may harm your dentures․ Once dissolved, the solution will be ready for soaking your dentures․ For best results, use the solution immediately after preparation and avoid letting it sit for extended periods before use․

4․2 Soaking Your Dentures

Once the Efferdent solution is prepared, gently place your dentures into the bowl or sink, ensuring they are completely submerged․ Allow them to soak for 15 minutes to ensure a deep clean․ For tougher stains, you can extend the soaking time to 30 minutes, but avoid exceeding this to prevent damage to certain materials․ During soaking, the effervescent action of Efferdent will help remove plaque, tartar, and stains․ After soaking, remove the dentures from the solution and proceed to the next step․ Always rinse your dentures with fresh water before brushing to remove any residual solution․ Soaking is a crucial step in maintaining the cleanliness and hygiene of your dentures, ensuring they remain fresh and odor-free․

4․3 Brushing the Dentures

After soaking, use a soft-bristle toothbrush or a denture brush to gently scrub all surfaces of your dentures․ Pay special attention to areas where plaque and stains tend to accumulate, such as around the joints and grooves․ Use a non-abrasive toothpaste or denture cleaner to avoid scratching the material․ Brush in gentle circular motions, ensuring thorough coverage․ This step helps remove any remaining debris and stains that the soaking solution may have loosened․ Be careful not to apply too much pressure, as this could damage delicate areas or attachments․ Rinse the brush frequently to avoid re-depositing loosened particles․ Brushing complements the soaking process, ensuring your dentures are clean, fresh, and free from residue․ Always rinse your dentures with fresh water after brushing to remove any remaining toothpaste or debris․

4․4 Rinsing Thoroughly

Rinsing your dentures thoroughly is a crucial step to remove any remaining Efferdent solution and loosened debris․ After soaking and brushing, rinse your dentures under warm running water to ensure all surfaces are clean․ Use fresh, clean water to eliminate any residual solution, as leftover Efferdent could taste unpleasant or cause irritation․ Pay attention to all areas, including the underside and between the teeth, where particles may linger․ For removable dentures, gently shake them under the water to dislodge any trapped debris․ Rinsing thoroughly ensures your dentures are free from cleaning agents and ready for wear․ Avoid using hot water, as it may warp some materials․ Finally, pat your dentures dry with a soft cloth to prevent water spots before storing or wearing them again․

Tips for Effective Cleaning

Maximize your denture hygiene by following these expert tips, ensuring a sparkling clean and fresh smile every time; Learn proper techniques and avoid common mistakes for optimal results․

5․1 Frequency of Cleaning

Consistency is key to maintaining clean and hygienic dentures․ For optimal results, clean your dentures at least twice daily, once in the morning and once before bed․ Soak them in Efferdent solution for the recommended 5 minutes to loosen plaque and stains․ For tougher stains, you can extend the soaking time, but never exceed the maximum duration specified in the instructions․ Regular cleaning prevents the buildup of bacteria and odors, ensuring your dentures remain fresh and comfortable․ Additionally, rinse your dentures with water after meals to remove loose food particles․ By establishing a routine, you can maintain the appearance and functionality of your dentures, while also promoting overall oral health․ Remember, consistent cleaning is essential for long-term satisfaction and confidence in your dentures․

5․2 Avoiding Common Mistakes

To ensure the effectiveness of Efferdent, avoid common mistakes that can compromise results․ Never use hot water, as it may damage the dentures or reduce the solution’s potency․ Avoid scrubbing too aggressively, as this can scratch the denture surface․ Do not soak dentures for longer than recommended, as this can cause discoloration or weaken the material․ Also, never reuse Efferdent solution, as it loses its cleaning effectiveness after the initial soak․ Additionally, avoid using abrasive cleaners or harsh chemicals, which can harm the dentures․ Always rinse thoroughly after soaking and brushing to remove any residual solution․ By adhering to these guidelines, you can maintain the integrity of your dentures and achieve a deeper, more consistent clean with Efferdent․ Proper care ensures your dentures remain in excellent condition for years to come․

Maintaining Efferdent

Properly maintaining Efferdent ensures its effectiveness and longevity․ Store the product in a cool, dry place away from direct sunlight and moisture․ Dispose of used solution responsibly, following local regulations․ Avoid contaminating water sources or recycling used tablets․ Keep Efferdent out of reach of children and pets to prevent accidental ingestion or misuse․ Regularly check the expiration date and replace expired tablets to ensure optimal cleaning performance․ By following these maintenance tips, you can preserve the quality of Efferdent and maintain its efficacy for consistent denture care․

6․1 Storage Tips

Proper storage of Efferdent is crucial to maintain its effectiveness․ Store the tablets in a cool, dry place away from direct sunlight and moisture․ Keep the container tightly sealed after each use to prevent exposure to air and humidity․ Avoid storing Efferdent in bathrooms, as the humid environment can degrade the product․ Ensure the storage location is out of reach of children and pets to prevent accidental ingestion․ Do not store Efferdent near chemicals or cleaning agents, as they may react with the tablets․ If you live in a hot or humid climate, consider storing Efferdent in an airtight container or ziplock bag․ Always check the expiration date before use and replace expired tablets to ensure optimal cleaning performance․ Proper storage helps preserve the potency and longevity of Efferdent, ensuring it remains effective for cleaning your dentures․

6․2 Disposal of Used Solution

After soaking your dentures, dispose of the used Efferdent solution responsibly․ Do not pour the solution down the drain, as it may harm aquatic life․ Instead, neutralize it by mixing with water before disposal․ Check local regulations for specific guidelines on disposing of cleaning solutions․ Ensure the solution is completely dissolved and diluted to prevent environmental impact․ Do not reuse the solution for future cleanings, as its effectiveness diminishes once dissolved․ Proper disposal helps maintain ecological balance and safety․ Always wear gloves when handling the solution and wash your hands thoroughly afterward․ Keep the disposal process out of reach of children and pets to avoid accidental exposure․ By following these steps, you can safely discard the used Efferdent solution while protecting the environment and ensuring a clean, hygienic process for your dentures․

Troubleshooting Common Issues

Address common challenges like residue buildup or stains by adjusting soak time or brushing thoroughly․ If issues persist, consult a dentist for professional advice and solutions․

7․1 If Dentures Are Not Clean

If your dentures remain unclear after cleaning, ensure Efferdent tablets are fully dissolved and the solution reaches the correct temperature․ Soak for the recommended time and gently brush with a soft-bristle brush to remove plaque․ Avoid using hot water, as it may warp dentures․ If residue persists, repeat the cleaning process or consult a dentist for professional cleaning․ Always follow the instructions carefully to achieve optimal results and maintain your dentures’ hygiene․

  • Check tablet dissolution before soaking․
  • Use a soft-bristle brush for gentle scrubbing․
  • Avoid hot water to prevent damage․

7․2 Dealing with Stains or Odors

If your dentures develop stubborn stains or unpleasant odors, ensure you follow the Efferdent cleaning process thoroughly․ Extend the soaking time slightly, but do not exceed the recommended duration․ After soaking, rinse your dentures under running water and gently scrub with a soft-bristle brush․ If stains persist, check the solution temperature and ensure tablets are fully dissolved․ For lingering odors, repeat the cleaning cycle or use a mild denture cleaner․ Avoid using abrasive materials, as they may damage the denture surface․ If the issue remains, consult your dentist for professional cleaning or advice․

  • Extend soaking time if needed․
  • Avoid using hot water or harsh chemicals․
  • Consult a dentist for persistent issues․

Frequently Asked Questions

Find answers to common questions about using Efferdent, ensuring proper care and maintenance of your dentures for optimal hygiene and longevity․

8․1 Can Efferdent Be Used Daily?

Efferdent can be used daily for effective cleaning of dentures․ It is safe and gentle, designed to remove plaque, stains, and odors without damaging your dentures․ For best results, use one tablet per cleaning, dissolving it in warm water as directed․ This daily regimen helps maintain hygiene and freshness, ensuring your dentures remain clean and comfortable․ Always follow the instructions provided to avoid overuse or improper application, which could potentially harm the denture material․ Regular use of Efferdent supports long-term oral health and confidence in wearing your dentures․

8․2 Is Efferdent Safe for All Types of Dentures?

Efferdent is generally safe for most types of dentures, including acrylic, nylon, and porcelain․ However, it is important to ensure compatibility with your specific denture material․ Always check the manufacturer’s guidelines or consult your dentist if you have specialized or delicate dentures․ Efferdent is designed to be gentle and effective, but certain materials may require alternative cleaning solutions․ For standard dentures, Efferdent is a reliable choice for maintaining cleanliness and hygiene․ If unsure, start with a small test soak to verify compatibility․ This ensures your dentures remain in excellent condition while avoiding potential damage․ Always prioritize your dentist’s advice for tailored care․

By following the Efferdent instructions outlined in this guide, you can effectively clean and maintain your dentures, ensuring they remain hygienic and long-lasting․ Regular use of Efferdent helps remove stubborn stains, plaque, and odor-causing bacteria, restoring your dentures to their original appearance․ Remember to always adhere to the safety precautions and cleaning steps to avoid damage and ensure optimal results․ Proper care not only extends the life of your dentures but also promotes good oral hygiene and confidence․ If you have specific concerns or doubts, consulting your dentist is always recommended․ With consistent effort and the right techniques, your dentures will stay clean, comfortable, and functional for years to come․ Take the time to care for your dentures, and they will continue to care for your smile․

Byakeem

danner boot fit guide

Danner Boots are renowned for their exceptional comfort, durability, and precise fit, offering high-quality footwear for various needs. With models like Mountain Light, they ensure superior support and style.

Overview of Danner Boots

Danner Boots are a trusted brand known for their high-quality craftsmanship and durability, offering a wide range of styles to suit different needs. From hiking to work boots, Danner provides exceptional comfort and support. Their boots are designed with premium materials, ensuring long-lasting performance. Whether for rugged terrain or everyday wear, Danner boots are praised for their fit and reliability. The brand caters to various preferences, offering options like waterproofing, insulation, and customizable features. With a focus on both functionality and style, Danner has built a reputation for delivering footwear that meets the demands of active lifestyles. Their commitment to quality and comfort makes them a favorite among outdoor enthusiasts and workers alike, ensuring a perfect blend of durability and style for every occasion.

Importance of Proper Boot Fit

Proper boot fit is crucial for comfort, performance, and overall foot health. Ill-fitting boots can lead to discomfort, blisters, and even long-term foot issues. Danner boots are designed to provide superior support and durability, but these benefits are fully realized only with the correct fit. A well-fitting boot ensures even weight distribution, prevents slippage, and maximizes traction, especially on uneven terrains. Additionally, proper fit enhances the boot’s ability to withstand wear and tear, prolonging its lifespan. Whether for hiking, work, or casual wear, investing time in ensuring the right fit guarantees a more enjoyable and safe experience. Danner’s attention to detail in craftsmanship makes proper fit essential to unlocking the full potential of their boots.

Key Considerations Before Purchasing Danner Boots

Understanding your foot shape, trying boots on, considering width options, and evaluating the role of socks and orthotics are essential for a perfect fit and comfort.

Understanding Your Foot Shape and Size

Accurately determining your foot shape and size is crucial for a proper fit. Foot shapes vary—narrow, wide, or flat—and can affect how Danner boots feel. Measure your feet using a Brannock device or trace them on paper to gauge length and width. Consider whether you have high arches or flat feet, as this impacts comfort and support. Danner boots are known for their durability and comfort, but proper sizing is essential to avoid issues like blisters or tightness. Some users suggest trying boots in the afternoon, as feet tend to swell slightly during the day. Ensure you wear the same type of socks you plan to use with the boots for an accurate fit. This step helps in selecting the right size and style for your specific needs, ensuring optimal comfort and performance.

Trying Danner Boots On: What to Expect

When trying on Danner boots, expect a snug yet comfortable fit. Start by ensuring the heel fits securely with minimal slippage. The toe box should allow enough space for your toes to move without feeling cramped. Danner boots are known for their high-quality materials, which may feel stiff at first but will break in over time. Wear the same type of socks you plan to use with the boots to ensure an accurate fit. Pay attention to comfort while standing and walking, as this will indicate how the boots perform during extended use. If possible, try them on in the afternoon, as feet tend to swell slightly throughout the day. This helps ensure the best fit for all-day wear.

Width Options: How to Choose the Right Fit

Danner boots offer various width options to cater to different foot shapes, ensuring optimal comfort and performance. The standard widths include Narrow, Medium, Wide, and Extra Wide. To choose the right fit, consider the natural shape of your foot and how it sits inside the boot. If your foot spreads noticeably when standing, a wider option may be necessary. Conversely, narrower feet may benefit from a slimmer fit to prevent excessive movement. Danner’s width options are designed to accommodate both everyday wear and specific activities, such as hiking or work. Always test the width by walking and standing to ensure a balanced fit that avoids pressure points or slipping.

The Role of Socks in Boot Fit

Socks play a critical role in achieving the perfect fit for Danner boots. They not only provide cushioning and moisture management but also influence how the boot conforms to your foot. Thicker socks can take up extra space, while thinner ones allow for a snugger fit. When trying on boots, wear the same type of socks you plan to use with them, as this ensures an accurate fit. Moisture-wicking socks are ideal for hiking or work boots, as they prevent blisters and keep feet dry. Danner recommends considering sock thickness when selecting a size, as it can affect overall comfort and performance. Always test boots with your preferred socks to ensure the best fit and feel.

Orthotics and Insoles: Do They Affect Fit?

Orthotics and custom insoles can significantly impact the fit of Danner boots. These additions take up space inside the boot, potentially altering the overall fit. If you plan to use orthotics or insoles, it’s essential to factor them into your sizing decision. Danner boots are designed to accommodate standard insoles, but thicker or custom orthotics may require a half or full size adjustment. Always try boots on with your orthotics or insoles to ensure proper fit and comfort. Neglecting this step could lead to tightness or discomfort, affecting performance. For optimal results, choose boots with enough room to accommodate both your foot and the orthotic or insole.

Danner Boot Sizing Guide

The Danner Boot Sizing Guide helps ensure a perfect fit by providing detailed size charts and measurement tips, considering foot shape, size, and personal comfort preferences.

Standard Sizing vs. Danner’s Sizing Chart

While standard shoe sizing provides a general guide, Danner’s sizing chart offers a more precise fit by considering both length and width measurements. Danner boots are known for their consistent sizing, but variations can occur due to boot style and materials. The company’s sizing chart accounts for these factors, ensuring a more accurate fit. Unlike standard sizing, which may vary between brands, Danner’s chart is tailored to their specific designs, making it a reliable tool for choosing the right size. By referencing Danner’s chart, customers can avoid common fit issues and enjoy a more comfortable, true-to-size experience. This attention to detail sets Danner apart in ensuring optimal boot fit for every wearer.

How to Measure Your Foot Accurately

To ensure the best fit, measuring your foot accurately is crucial. Start by placing your foot on a flat surface, such as a piece of paper, while wearing the same thickness of socks you plan to wear with your boots. Trace the outline of your foot carefully, ensuring the pen is held perpendicular to the paper. Measure the longest point of your foot for length and the widest point across the ball for width. Use a ruler to record these measurements in inches or centimeters. For added accuracy, use a Brannock device, commonly found in shoe stores, to determine your exact size and width. This method ensures your Danner boots will fit comfortably and provide optimal support. Consistency in measurement is key to achieving the perfect fit.

Danner’s Half-Size Options: Do They Run True to Size?

Danner’s half-size options are designed to provide a more precise fit for individuals whose feet don’t conform to standard whole sizes. These half-sizes are intended to run true to size, offering additional comfort and support. However, the fit can vary slightly depending on the specific boot model and materials used. For example, boots with stiffer leather may feel snugger, while softer materials may stretch slightly over time. To ensure accuracy, it’s recommended to try on half-sizes with the same type of socks you plan to wear regularly. This approach helps determine whether the half-size meets your comfort expectations. Danner’s commitment to quality ensures that their sizing remains consistent across their product line. Always consider the break-in period when assessing fit, as this can impact how the half-size feels over time. Testing the boots during different times of the day, as feet tend to swell slightly, can also provide a more accurate fit assessment. By combining these factors, you can make an informed decision about whether Danner’s half-size options are the right choice for your foot shape and size.

Difference Between Men’s and Women’s Sizing

Danner boots offer distinct sizing for men and women, tailored to accommodate anatomical differences in foot shape and size. Men’s boots typically feature a roomier toe box and a wider overall fit, while women’s boots are designed with a narrower heel and a more tapered toe to match the average female foot shape. Both sizing charts are standardized separately, ensuring accuracy for each gender. However, individual foot shapes may vary, so it’s crucial to try boots on or refer to Danner’s size conversion charts for the best fit. The company provides specific guidelines to help customers transition between men’s and women’s sizes if needed. By understanding these differences, you can select the appropriate size for optimal comfort and support.

Comfort and Fit: What to Look For

Look for breathable materials, adequate cushioning, and a supportive insole for comfort. Ensure the boot flexes naturally and has a secure lacing system for a proper fit.

Break-in Period: What to Expect

The break-in period for Danner Boots is a crucial phase that ensures optimal comfort and performance. Known for their durability and quality, Danner Boots are crafted from premium materials such as full-grain leather, which offers excellent support but requires a short period to mold to your feet.

During this time, you may experience some stiffness or snugness, especially if you’re new to wearing high-quality leather boots. To ease the process, consider wearing thicker socks or applying leather conditioners to soften the material gradually.

Patience is key, as the boots will eventually conform to your foot shape, providing a comfortable and personalized fit. This initial effort ensures that your Danner Boots will deliver long-lasting comfort and support for years to come.

Heel Fit: Ensuring No Slippage

A proper heel fit is essential for comfort and performance in Danner Boots. The heel should feel snug but not overly tight, preventing slippage that can lead to discomfort or blisters. Danner Boots feature sturdy heel counters and cushioning to keep the heel secure. The lacing system also plays a role in maintaining a snug fit around the ankle. When trying on boots, wear the same type of socks you intend to use to ensure an accurate fit. Aim for a balance where the heel stays in place without feeling constricted. Walking around the store can help assess the heel fit during movement. A proper fit ensures all-day comfort and support, making Danner Boots ideal for various activities. Proper heel fit is crucial for optimal performance and comfort.

Toe Box: Importance of Space and Comfort

The toe box is a critical factor in ensuring comfort and preventing discomfort or injury. Danner Boots are designed with roomy toe boxes to allow natural toe movement, reducing the risk of blisters or toenail issues. A proper fit ensures your toes have enough space to wiggle without feeling cramped. If the toe box is too tight, it can lead to discomfort during long walks or hikes. Conversely, excessive space may cause slipping. When trying on boots, pay attention to how your toes feel—there should be no pressure or pinching. Danner’s boots often feature cushioned toe boxes for added comfort. Proper toe box fit enhances overall boot performance and ensures a pleasant experience. Always prioritize toe box comfort for optimal wearability and support.

Ankle Support: High vs. Mid vs. Low Boots

Ankle support is a vital aspect of boot fit, and Danner Boots offer varying levels depending on the style. High boots provide maximum ankle stability, making them ideal for rough terrains or heavy-duty work. Mid boots strike a balance, offering moderate support while maintaining flexibility, suitable for everyday wear or light hiking. Low boots prioritize comfort and mobility, with minimal ankle support, best for casual use or smooth surfaces. Choosing the right height depends on your activity and personal preference. Danner’s designs ensure that regardless of height, the boots deliver consistent comfort and durability. Proper ankle support enhances performance and reduces the risk of fatigue or injury, making it a key consideration when selecting your boots.

Danner Boot Models: Fit Differences

Danner offers various boot models, each with unique fit characteristics tailored to specific needs. From hiking to work boots, each style ensures optimal comfort and support.

Danner’s attention to detail in design guarantees a precise fit, catering to different activities and preferences while maintaining high-quality craftsmanship and durability in every model.

Danner Mountain Light and Light II: Fit Characteristics

Danner Mountain Light and Light II boots are renowned for their exceptional fit and durability. These boots feature a roomy toe box, ensuring comfort during long hikes, while the heel stays snug to prevent slippage.

The boots are designed with a standard fit, accommodating average foot shapes, and are true to size, making them ideal for hikers seeking reliability. The ankle support is moderate, offering stability without restricting movement, and the breathable materials keep feet dry in various conditions. The Vibram outsole enhances traction, further improving the overall fit experience for outdoor enthusiasts. These boots are a top choice for those prioritizing both comfort and performance in challenging terrains. Their consistent fit ensures a reliable experience, making them a favorite among hikers and outdoor enthusiasts.

Danner Work Boots: Fit and Comfort Features

Danner Work Boots are designed for durability and comfort, offering a snug, supportive fit ideal for demanding jobs. They feature a roomy toe box to prevent toe compression and a secure heel to minimize slippage. The boots are built with cushioned insoles and sturdy outsoles for shock absorption and traction. Danner’s work boots often include waterproof membranes and breathable liners, ensuring dryness and comfort in harsh conditions. Available in various widths, they cater to different foot shapes, and their durable construction provides long-lasting support. The boots are true to size, with a moderate break-in period, making them a reliable choice for workers needing both protection and comfort. Their robust design and ergonomic features ensure all-day wearability and performance.

Danner Hiking Boots: Fit for Different Terrains

Danner hiking boots are engineered for varying terrains, ensuring a secure and comfortable fit whether on trails, rocky surfaces, or wet environments. They feature waterproof membranes, durable outsoles with aggressive tread patterns, and ankle support tailored for stability. The boots are designed with a roomy toe box for comfort during long hikes and a snug heel to prevent slippage. Danner’s hiking boots come in different heights, offering options for ankle mobility or added support. The fit is consistent with Danner’s sizing chart, and they accommodate thick hiking socks. Orthotics can be added for personalized support without compromising the boot’s integrity. With their rugged construction and ergonomic design, Danner hiking boots deliver reliability and comfort across diverse outdoor conditions.

Danner Casual Boots: Fit for Everyday Wear

Danner casual boots are designed for everyday wear, blending comfort and style seamlessly. They feature soft, durable leathers and cushioned insoles for all-day comfort. The fit is relaxed yet supportive, with a roomy toe box and snug heel to prevent slippage. Danner’s casual boots are lightweight, making them ideal for urban environments and casual outings. They often include flexible outsoles for natural movement and versatility. The sizing remains consistent with Danner’s sizing chart, ensuring a reliable fit. These boots pair well with jeans or dress pants, offering a versatile option for daily use. With their timeless designs and comfortable fit, Danner casual boots are perfect for those seeking durability and style without compromising on comfort.

Tips for a Perfect Fit

Choose the right size by trying boots on later in the day, wearing similar socks, and ensuring a snug yet comfortable fit while standing.

How to Test Boots Before Purchase

Testing boots before purchase is crucial for ensuring the perfect fit. Start by trying them on in the afternoon, as feet tend to swell throughout the day. Wear the same type of socks you plan to use with the boots. Stand up and walk around to assess comfort and support. Check for heel slippage by ensuring a snug fit without tightness. Press your thumb into the toe box to verify adequate space for your toes. If possible, test the boots on both feet, as foot sizes can differ slightly. Pay attention to any pressure points or discomfort. Finally, consider the break-in period and how the boots will feel after extended wear. This thorough testing ensures a comfortable and functional fit for your Danner boots.

Walking and Standing: Testing Fit

Walking and standing are essential steps in testing boot fit. When walking, pay attention to how your feet move within the boots. Ensure there’s no excessive heel slippage or tightness in the toe box. The boots should flex naturally with your stride without causing discomfort. While standing, check if the weight distribution feels balanced and if the arch support aligns with your foot’s natural curve. Shift your weight slightly to test for any pressure points or hotspots. This helps confirm whether the boots provide consistent comfort during movement and rest. Proper fit should feel stable and supportive, allowing you to walk and stand confidently without distractions.

Temperature and Fit: How Heat Affects Boots

Temperature can influence boot fit, as heat causes materials to expand slightly. On warmer days, boots may feel tighter due to natural foot swelling and material softening. Conversely, in colder conditions, boots might feel looser. To ensure proper fit, test boots in varying temperatures or during the afternoon when feet tend to be slightly larger. Consider the thickness of socks, as heavier ones can occupy more space. Danner boots, made from high-quality materials, are designed to maintain shape and comfort across temperatures. However, extreme heat can still impact fit, so it’s wise to account for these changes. Proper fit should remain consistent regardless of environmental conditions for optimal performance and comfort.

Common Mistakes to Avoid

Common mistakes include not trying boots on, ignoring sizing charts, and assuming size consistency across brands. Always test fit and prioritize comfort over style.

Not Trying Boots On Before Purchase

Not trying boots on before purchasing is a common mistake that can lead to poor fit and discomfort. Danner Boots, like all footwear, vary in fit due to materials, design, and personal foot shape. Assuming your size remains consistent across brands or models can result in boots that are too tight or too loose. This oversight can cause blisters, discomfort, or even long-term foot issues. Trying boots on allows you to assess heel fit, toe box space, and overall comfort. Additionally, factors like sock thickness and orthotics can influence fit, making it crucial to test boots in person. Always prioritize a hands-on try-on to ensure the best fit and performance for your needs.

Ignoring Sizing Charts and Reviews

Overlooking sizing charts and customer reviews is a significant oversight when purchasing Danner Boots. Sizing charts provide precise measurements tailored to Danner’s specific designs, ensuring the best fit. Reviews offer real-world insights into how boots perform, highlighting comfort, durability, and any fit inconsistencies. Ignoring these resources can lead to purchasing boots that are too tight or too loose, causing discomfort and potentially requiring returns. Additionally, Danner’s sizing may differ from other brands, and reviews often address these nuances. By dismissing this information, you risk compromising both fit and performance. Always consult sizing guides and read reviews to make an informed decision and ensure your boots meet your needs for comfort and functionality.

Not Considering Personal Comfort Preferences

Personal comfort preferences are crucial when selecting Danner Boots, as they directly impact wearability and satisfaction. Ignoring factors like cushioning, flexibility, and breathability can lead to discomfort, especially during extended wear. For instance, individuals who prioritize soft insoles or moisture-wicking liners may find boots lacking these features unsuitable. Similarly, those who prefer a snug fit versus a roomy design might face issues if their preference isn’t considered. Neglecting these aspects can result in foot fatigue, blisters, or even long-term foot problems. Always assess your comfort needs based on your lifestyle and activity type to ensure the boots align with your expectations for all-day wearability and performance.

Final Thoughts on Danner Boot Fit

Proper fit is essential for comfort, durability, and performance in Danner boots. By understanding your foot shape, trying boots on, and considering factors like socks and orthotics, you can ensure a perfect fit. Danner offers a range of sizes and widths to accommodate different needs, and their half-size options provide additional customization. Remember, everyone’s feet are unique, so personal comfort preferences should guide your decision. Don’t rush the process—take time to test boots thoroughly. Trust Danner’s reputation for quality and follow this guide to make an informed purchase. Your feet will thank you for prioritizing a comfortable, well-fitting boot that meets your lifestyle demands.

Encouragement to Follow the Guide

Investing time in finding the perfect fit for your Danner boots is worth the effort. Proper fit ensures comfort, prevents discomfort, and enhances performance. By following this guide, you can make an informed decision tailored to your needs. Danner’s reputation for quality and durability is unmatched, but only with the right fit will you truly appreciate their craftsmanship. Don’t hesitate to explore different sizes, widths, and styles until you find your ideal pair. Your feet deserve the best, and with this guide, you’re equipped to make the right choice. Take the extra steps to ensure your boots feel great from day one—your comfort and satisfaction depend on it.

Byakeem

refrigeration and air conditioning technology pdf

Refrigeration and air conditioning technology are critical components of modern life‚ playing a vital role in maintaining comfort‚ preserving food‚ and ensuring the proper functioning of various industrial processes. These technologies are designed to control temperature and humidity levels in both residential and commercial environments‚ making them indispensable in today’s world.

The fundamental principle of refrigeration and air conditioning systems lies in the transfer of heat from one location to another. This is typically achieved through the use of refrigerants‚ substances that change state from liquid to gas as they absorb heat and from gas to liquid as they release it. The vapor-compression refrigeration cycle is the most common method employed in these systems‚ involving four key stages: evaporation‚ compression‚ condensation‚ and expansion.

Air conditioning systems‚ on the other hand‚ are designed to not only cool the air but also to dehumidify it‚ improving indoor air quality and thermal comfort. These systems often incorporate advanced technologies‚ such as smart sensors and IoT-enabled controllers‚ to optimize performance and energy efficiency. The integration of intelligent diagnostic systems‚ as seen in some modern air conditioning units‚ allows for real-time monitoring and fault detection‚ ensuring uninterrupted operation and reducing maintenance costs.

The applications of refrigeration and air conditioning technology are vast and varied. In the healthcare sector‚ precise temperature control is essential for storing medical supplies‚ vaccines‚ and blood products. Similarly‚ in the food industry‚ refrigeration systems are crucial for preserving perishable goods and preventing spoilage. Industrial processes also rely heavily on these technologies to maintain optimal operating conditions for machinery and to ensure the quality of manufactured goods.

Recent advancements in refrigeration and air conditioning technology have focused on improving energy efficiency and reducing environmental impact. The development of eco-friendly refrigerants‚ such as those with low global warming potential‚ has gained significant attention in recent years. Additionally‚ the use of alternative cooling methods‚ such as absorption and magnetic refrigeration‚ is being explored to provide sustainable solutions for the future.

According to the International Energy Agency (IEA)‚ approximately one-fifth of the world’s electricity is consumed by refrigeration and air conditioning systems. This highlights the importance of developing more efficient and sustainable technologies to meet the growing demand for cooling solutions‚ especially in developing regions where the adoption of air conditioning is expected to rise significantly in the coming years.

Byakeem

dayc-2 scoring manual pdf

The DAYC-2 Scoring Manual provides comprehensive guidelines for accurately assessing developmental skills across multiple domains. It includes detailed scoring procedures‚ age-related adjustments‚ and interpretation strategies to ensure reliable results.

1.1 Overview of the DAYC-2 Assessment

The DAYC-2 Assessment is a comprehensive tool designed to evaluate developmental skills in children across multiple domains‚ including adaptive behavior‚ cognitive abilities‚ communication‚ physical development‚ and social-emotional functioning. It provides a structured framework for professionals to assess developmental progress‚ identify strengths‚ and detect potential delays. The assessment is organized into subtests‚ each corresponding to specific developmental areas‚ ensuring a holistic understanding of a child’s abilities. Scores are derived from observed behaviors‚ responses‚ and task performances‚ offering insights into developmental milestones. The DAYC-2 is widely used in educational‚ clinical‚ and research settings to guide intervention planning and monitor progress over time. By focusing on age-related expectations‚ it ensures that assessments are developmentally appropriate and meaningful. This tool is particularly valuable for early identification of developmental challenges‚ enabling timely support and intervention strategies.

1.2 Importance of Accurate Scoring

Accurate scoring in the DAYC-2 Assessment is crucial to ensure reliable and valid results. Precise scoring enables professionals to identify a child’s developmental strengths and challenges effectively. It also informs individualized intervention strategies and progress monitoring. Inaccurate scoring can lead to misinterpretation of abilities‚ potentially resulting in inappropriate interventions or a lack of necessary support. To achieve accuracy‚ examiners must adhere to the guidelines outlined in the scoring manual‚ paying close attention to age-related adjustments and raw-to-standard score conversions. Special cases and exceptions must be handled with care‚ as outlined in the manual‚ to maintain consistency and fairness. Documenting scoring decisions is equally important for transparency and accountability. By following best practices‚ professionals can ensure that the DAYC-2 Assessment provides a clear and actionable understanding of a child’s developmental status. This‚ in turn‚ supports informed decision-making for educational and therapeutic planning.

1.3 Structure of the Scoring Manual

The DAYC-2 Scoring Manual is organized into five main sections‚ each designed to guide users through the assessment process systematically. Section 1 provides an introduction to the manual‚ including an overview of the DAYC-2 Assessment and the importance of accurate scoring. Section 2 delves into the scoring system‚ explaining raw scores‚ standard score conversions‚ and age-related adjustments. Section 3 details scoring procedures for each domain‚ such as adaptive behavior‚ cognitive skills‚ and physical development. Section 4 includes appendices with essential resources like scoring templates‚ conversion tables‚ and interpretation guidelines. Section 5 focuses on best practices for ensuring scoring accuracy‚ including establishing basal and ceiling levels‚ handling special cases‚ and documenting decisions. This structured approach ensures clarity and ease of use for professionals administering the DAYC-2 Assessment. The manual is designed to be both comprehensive and user-friendly‚ supporting accurate and reliable scoring outcomes.

Understanding the DAYC-2 Scoring System

The DAYC-2 Scoring System involves calculating raw scores‚ converting them to standard scores‚ and applying age-related adjustments for accurate assessment of developmental skills.

2.1 Raw Scores and Their Significance

Raw scores in the DAYC-2 assessment represent the total number of correct responses a child provides during testing. These scores are fundamental as they serve as the starting point for all subsequent calculations‚ including the conversion to standard scores. Each subtest within the assessment yields a raw score‚ which reflects the child’s performance in specific skill areas. The significance of raw scores lies in their ability to provide a clear‚ unadjusted measure of the child’s abilities. They are essential for establishing a baseline for further analysis and are used to determine the child’s developmental standing relative to peers. By understanding raw scores‚ examiners can identify strengths and areas needing support‚ ensuring accurate and meaningful assessments.

2.2 Converting Raw Scores to Standard Scores

Converting raw scores to standard scores is a critical step in the DAYC-2 assessment process. This conversion allows for comparisons across different age groups and provides a standardized measure of a child’s performance; The manual provides detailed tables in Appendix B‚ which list raw scores alongside corresponding standard scores for each subtest. To convert a raw score‚ examiners locate the appropriate subtest and the child’s age‚ then find the matching standard score. Age-related norms are applied to ensure scores reflect developmental expectations accurately. Standard scores are typically expressed as percentiles or other metrics‚ offering a clear understanding of the child’s standing relative to peers. This step is essential for interpreting results and identifying areas of strength or need. Accurate conversion is vital‚ and examiners are encouraged to double-check their calculations to ensure reliability.

2.3 Age-Related Scoring Adjustments

Age-related scoring adjustments are essential to account for developmental differences across various age groups. The DAYC-2 Scoring Manual provides standardized tables to ensure scores reflect a child’s performance relative to their peers. Adjustments are applied during the conversion of raw scores to standard scores‚ using age-specific norms outlined in Appendix B. This ensures that scores are interpreted within a developmental context‚ allowing for accurate comparisons. Examiners must carefully apply these adjustments to maintain the integrity of the assessment. The manual emphasizes the importance of adhering to these guidelines to avoid over- or underestimating a child’s abilities. By incorporating age-related adjustments‚ the DAYC-2 provides a fair and reliable measure of developmental progress. This step is crucial for identifying individual strengths‚ challenges‚ and growth areas. Accurate application of these adjustments is key to ensuring valid and actionable results.

Scoring Procedures for Each Domain

This section outlines specific scoring methods for each developmental domain‚ ensuring clarity and consistency in assessment. It covers adaptive behavior‚ cognitive‚ communication‚ physical‚ and social-emotional domains.

3.1 Adaptive Behavior Domain Scoring

The Adaptive Behavior Domain assesses practical‚ social‚ and conceptual skills necessary for everyday living. Scoring involves evaluating tasks that reflect real-world applications‚ such as self-care‚ communication‚ and problem-solving. Raw scores are assigned based on the child’s performance‚ with higher scores indicating greater proficiency. These scores are then converted to standard scores using age-specific conversion tables provided in Appendix B. The manual emphasizes the importance of age-related adjustments to ensure accuracy. For example‚ if a child scores zero on initial items‚ testers are instructed to administer easier tasks until a basal level is established. Detailed guidelines address special cases‚ such as incomplete responses or refusal to attempt items. Accurate scoring requires careful observation and adherence to defined criteria. This section also includes examples of scoring templates to guide examiners. By following these procedures‚ professionals can ensure reliable and valid results for the Adaptive Behavior Domain.

3.2 Cognitive Domain Scoring

The Cognitive Domain of the DAYC-2 assesses reasoning‚ problem-solving‚ and thinking abilities. Scoring involves evaluating tasks that measure intellectual functioning‚ such as memory‚ conceptual understanding‚ and logical reasoning. Raw scores are calculated based on the child’s performance‚ with adjustments made for age to ensure fairness. Standard scores are derived using conversion tables in Appendix B‚ providing a normalized measure of cognitive ability. Testers must establish a basal level by administering easier items if the child scores zero on initial tasks. Special cases‚ such as incomplete or ambiguous responses‚ are addressed with specific guidelines to ensure consistency. The manual emphasizes precise scoring to avoid biases and errors. Examples and scoring templates are provided to guide examiners in applying criteria accurately. Accurate Cognitive Domain scoring is essential for understanding a child’s intellectual development and planning appropriate interventions. This section ensures reliable and valid assessment of cognitive skills.

3.3 Communication Domain Scoring

The Communication Domain of the DAYC-2 assesses verbal and non-verbal language skills‚ including expression‚ comprehension‚ and pragmatics. Scoring involves evaluating responses to tasks that measure language development‚ such as vocabulary‚ sentence structure‚ and conversational abilities. Raw scores are calculated based on the child’s performance‚ with age-related adjustments applied to ensure fairness. Standard scores are derived using conversion tables in Appendix B‚ providing a normalized measure of communication abilities. Testers must establish a basal level by administering easier items if the child scores zero on initial tasks. Special cases‚ such as incomplete or ambiguous responses‚ are addressed with specific guidelines to ensure consistency. The manual emphasizes precise scoring to avoid biases and errors. Examples and scoring templates are provided to guide examiners in applying criteria accurately. Accurate Communication Domain scoring is essential for understanding a child’s language development and planning appropriate interventions. This section ensures reliable and valid assessment of communication skills.

3.4 Physical Development Domain Scoring

The Physical Development Domain evaluates motor skills‚ coordination‚ and physical abilities. Scoring focuses on tasks assessing fine and gross motor functions‚ such as drawing‚ balance‚ and object manipulation. Raw scores are calculated by summing correct responses‚ with age adjustments applied to account for developmental stages. Standard scores are derived using conversion tables in Appendix B‚ providing a normalized measure of physical abilities. Testers must establish basal and ceiling levels to ensure accurate assessment. Special considerations‚ such as physical limitations‚ are addressed with specific guidelines to ensure fair scoring. The manual provides detailed criteria for evaluating each task‚ including examples and scoring templates. Accurate scoring in this domain is crucial for identifying developmental delays and planning interventions. This section ensures reliable and valid assessment of physical skills‚ aiding in understanding a child’s overall motor development. Proper documentation of scoring decisions is emphasized to maintain consistency and transparency.

3.5 Social-Emotional Domain Scoring

The Social-Emotional Domain assesses a child’s ability to interact with others‚ regulate emotions‚ and demonstrate empathy. Scoring focuses on observed behaviors and responses to social scenarios. Raw scores are derived by summing correct responses‚ with adjustments for age to reflect developmental norms. Standard scores are calculated using conversion tables in Appendix B‚ providing a normalized measure of social-emotional functioning. Testers must establish basal and ceiling levels to ensure accurate assessment. Special cases‚ such as selective responses or emotional distress‚ are addressed with specific scoring guidelines. The manual emphasizes documenting all scoring decisions to ensure transparency. This domain is crucial for identifying strengths and challenges in social interactions‚ enabling targeted interventions. Proper scoring ensures a comprehensive understanding of a child’s social-emotional development‚ supporting individualized planning and growth.

Appendices and Reference Materials

The appendices provide essential tools for accurate scoring‚ including templates‚ conversion tables‚ and interpretation guidelines. These resources support efficient and reliable assessment processes.

4.1 Appendix A: Scoring Templates

Appendix A offers standardized scoring templates designed to streamline the evaluation process. These templates provide clear frameworks for recording raw scores‚ converting them to standard scores‚ and documenting observations. They are organized by domain‚ ensuring that each aspect of development—adaptive behavior‚ cognitive‚ communication‚ physical‚ and social-emotional—is systematically assessed. The templates include spaces for noting basal and ceiling levels‚ special cases‚ and any exceptions encountered during testing. This section also provides examples of completed templates to guide users in accurate and consistent scoring. Additionally‚ the templates are customizable to accommodate individualized assessment needs‚ making them a versatile tool for professionals. By using these templates‚ examiners can ensure precision and reduce errors in scoring‚ ultimately leading to more reliable and valid results. This resource is indispensable for maintaining consistency across assessments.

4.2 Appendix B: Conversion Tables

Appendix B contains detailed conversion tables essential for translating raw scores into standardized measures. These tables facilitate the transformation of raw scores from each subtest into standard scores‚ allowing for age-appropriate comparisons. The tables are organized by age ranges and domains‚ ensuring precise conversions aligned with developmental norms. Examiners can quickly locate the corresponding standard score for each raw score‚ enhancing efficiency. Additionally‚ the appendix includes instructions on how to apply age-related adjustments to ensure accurate score interpretations. The conversion tables are cross-referenced with the scoring templates in Appendix A‚ providing a seamless process from data collection to final scoring. This resource is crucial for maintaining consistency and accuracy in the assessment process‚ enabling professionals to make informed decisions based on reliable data. Regular updates ensure the tables reflect current norms and standards.

4.3 Appendix C: Interpretation Guidelines

Appendix C provides detailed guidelines for interpreting DAYC-2 scores‚ ensuring meaningful analysis of assessment results; It offers strategies for understanding standard scores‚ percentiles‚ and developmental quotients. The appendix includes examples of how to contextualize scores within individual and environmental factors. Professionals can use these guidelines to identify strengths‚ weaknesses‚ and areas requiring intervention. Additionally‚ it outlines how to communicate results effectively to parents‚ educators‚ and other stakeholders. The appendix emphasizes the importance of considering age-related adjustments and domain-specific norms when interpreting data. By following these guidelines‚ examiners can ensure that interpretations are accurate‚ reliable‚ and useful for planning supportive interventions. This section is essential for translating raw data into actionable insights‚ fostering informed decision-making for children’s development and well-being.

Best Practices for Scoring Accuracy

This section outlines strategies to enhance scoring precision‚ including establishing clear basal and ceiling levels‚ addressing special cases‚ and documenting decisions thoroughly to ensure consistency and reliability in assessments.

5.1 Establishing Basal and Ceiling Levels

Establishing basal and ceiling levels is crucial for efficient and accurate scoring. Begin by identifying the basal level‚ where the child consistently scores correctly (e.g.‚ three consecutive correct responses). Once the basal level is determined‚ administer items forward until reaching the ceiling level‚ defined by three consecutive incorrect responses. This approach ensures that testing focuses on the child’s skill range‚ optimizing both time and accuracy. Properly setting these levels helps in obtaining reliable raw scores‚ which are essential for converting to standard scores. The manual provides detailed criteria for determining these levels across all domains‚ ensuring consistency and reducing examiner bias. By adhering to these guidelines‚ examiners can confidently assess each child’s abilities within the appropriate developmental framework.

5.2 Handling Special Cases and Exceptions

The DAYC-2 Scoring Manual provides specific guidance for handling special cases and exceptions that may arise during the scoring process. For instance‚ if a child scores 0 on any of the first three items‚ examiners are instructed to test backward until the child achieves three consecutive correct responses to establish a basal level. Additionally‚ the manual addresses scenarios where items may require special considerations‚ such as when a child’s response does not fit standard scoring criteria. In such cases‚ examiners are advised to document the rationale for their scoring decisions thoroughly. The manual also emphasizes the importance of using the provided conversion tables to ensure accurate standard score calculations‚ even in atypical cases. By following these guidelines‚ examiners can maintain consistency and reliability when dealing with unusual or ambiguous responses. Proper documentation ensures transparency and supports defensible scoring decisions.

5.3 Documenting Scoring Decisions

Accurate documentation of scoring decisions is essential to ensure transparency and accountability in the DAYC-2 assessment process. Examiners should record the rationale behind any unconventional scoring decisions‚ particularly in cases where items do not fit standard scoring criteria. This includes noting instances where a child’s response deviates from expected norms or when adjustments are made due to special cases. The manual emphasizes the importance of maintaining detailed records‚ as this supports defensible scoring practices and facilitates review or reinterpretation of results if needed. Additionally‚ documentation should include any basal or ceiling levels established during testing‚ as well as the use of conversion tables to derive standard scores. By adhering to these guidelines‚ examiners can ensure that scoring decisions are consistent‚ reliable‚ and aligned with the DAYC-2’s standardized procedures. Proper documentation also aids in maintaining the integrity of the assessment process across different examiners and settings.